3. Ordering and fighting |
This phase consists of 4 steps that the active player executes one by one:
The active player now places any units from the Base Camp into all of his own areas (or into the areas of his alliance partners) from which he would like to get active.
In sea areas (white circle with anchor symbol), no units can be placed directly from the base camp.
Attention: The number of units placed (including the existing unit) must not be higher than the production points of the respective area.
Tip: By research “Military – Level 2”, the maximum number of units per area can be increased by one. Each player should always keep a few units in his Base Camp to defend themselves in the other players’ moves.
Note: For active “Special Skills” of nations, the player who plays the US may exceed the maximum number of units per area by one unit. If this player has also completed the research “Military – Level 2”, this player may even exceed the maximum number of units per area by two units.
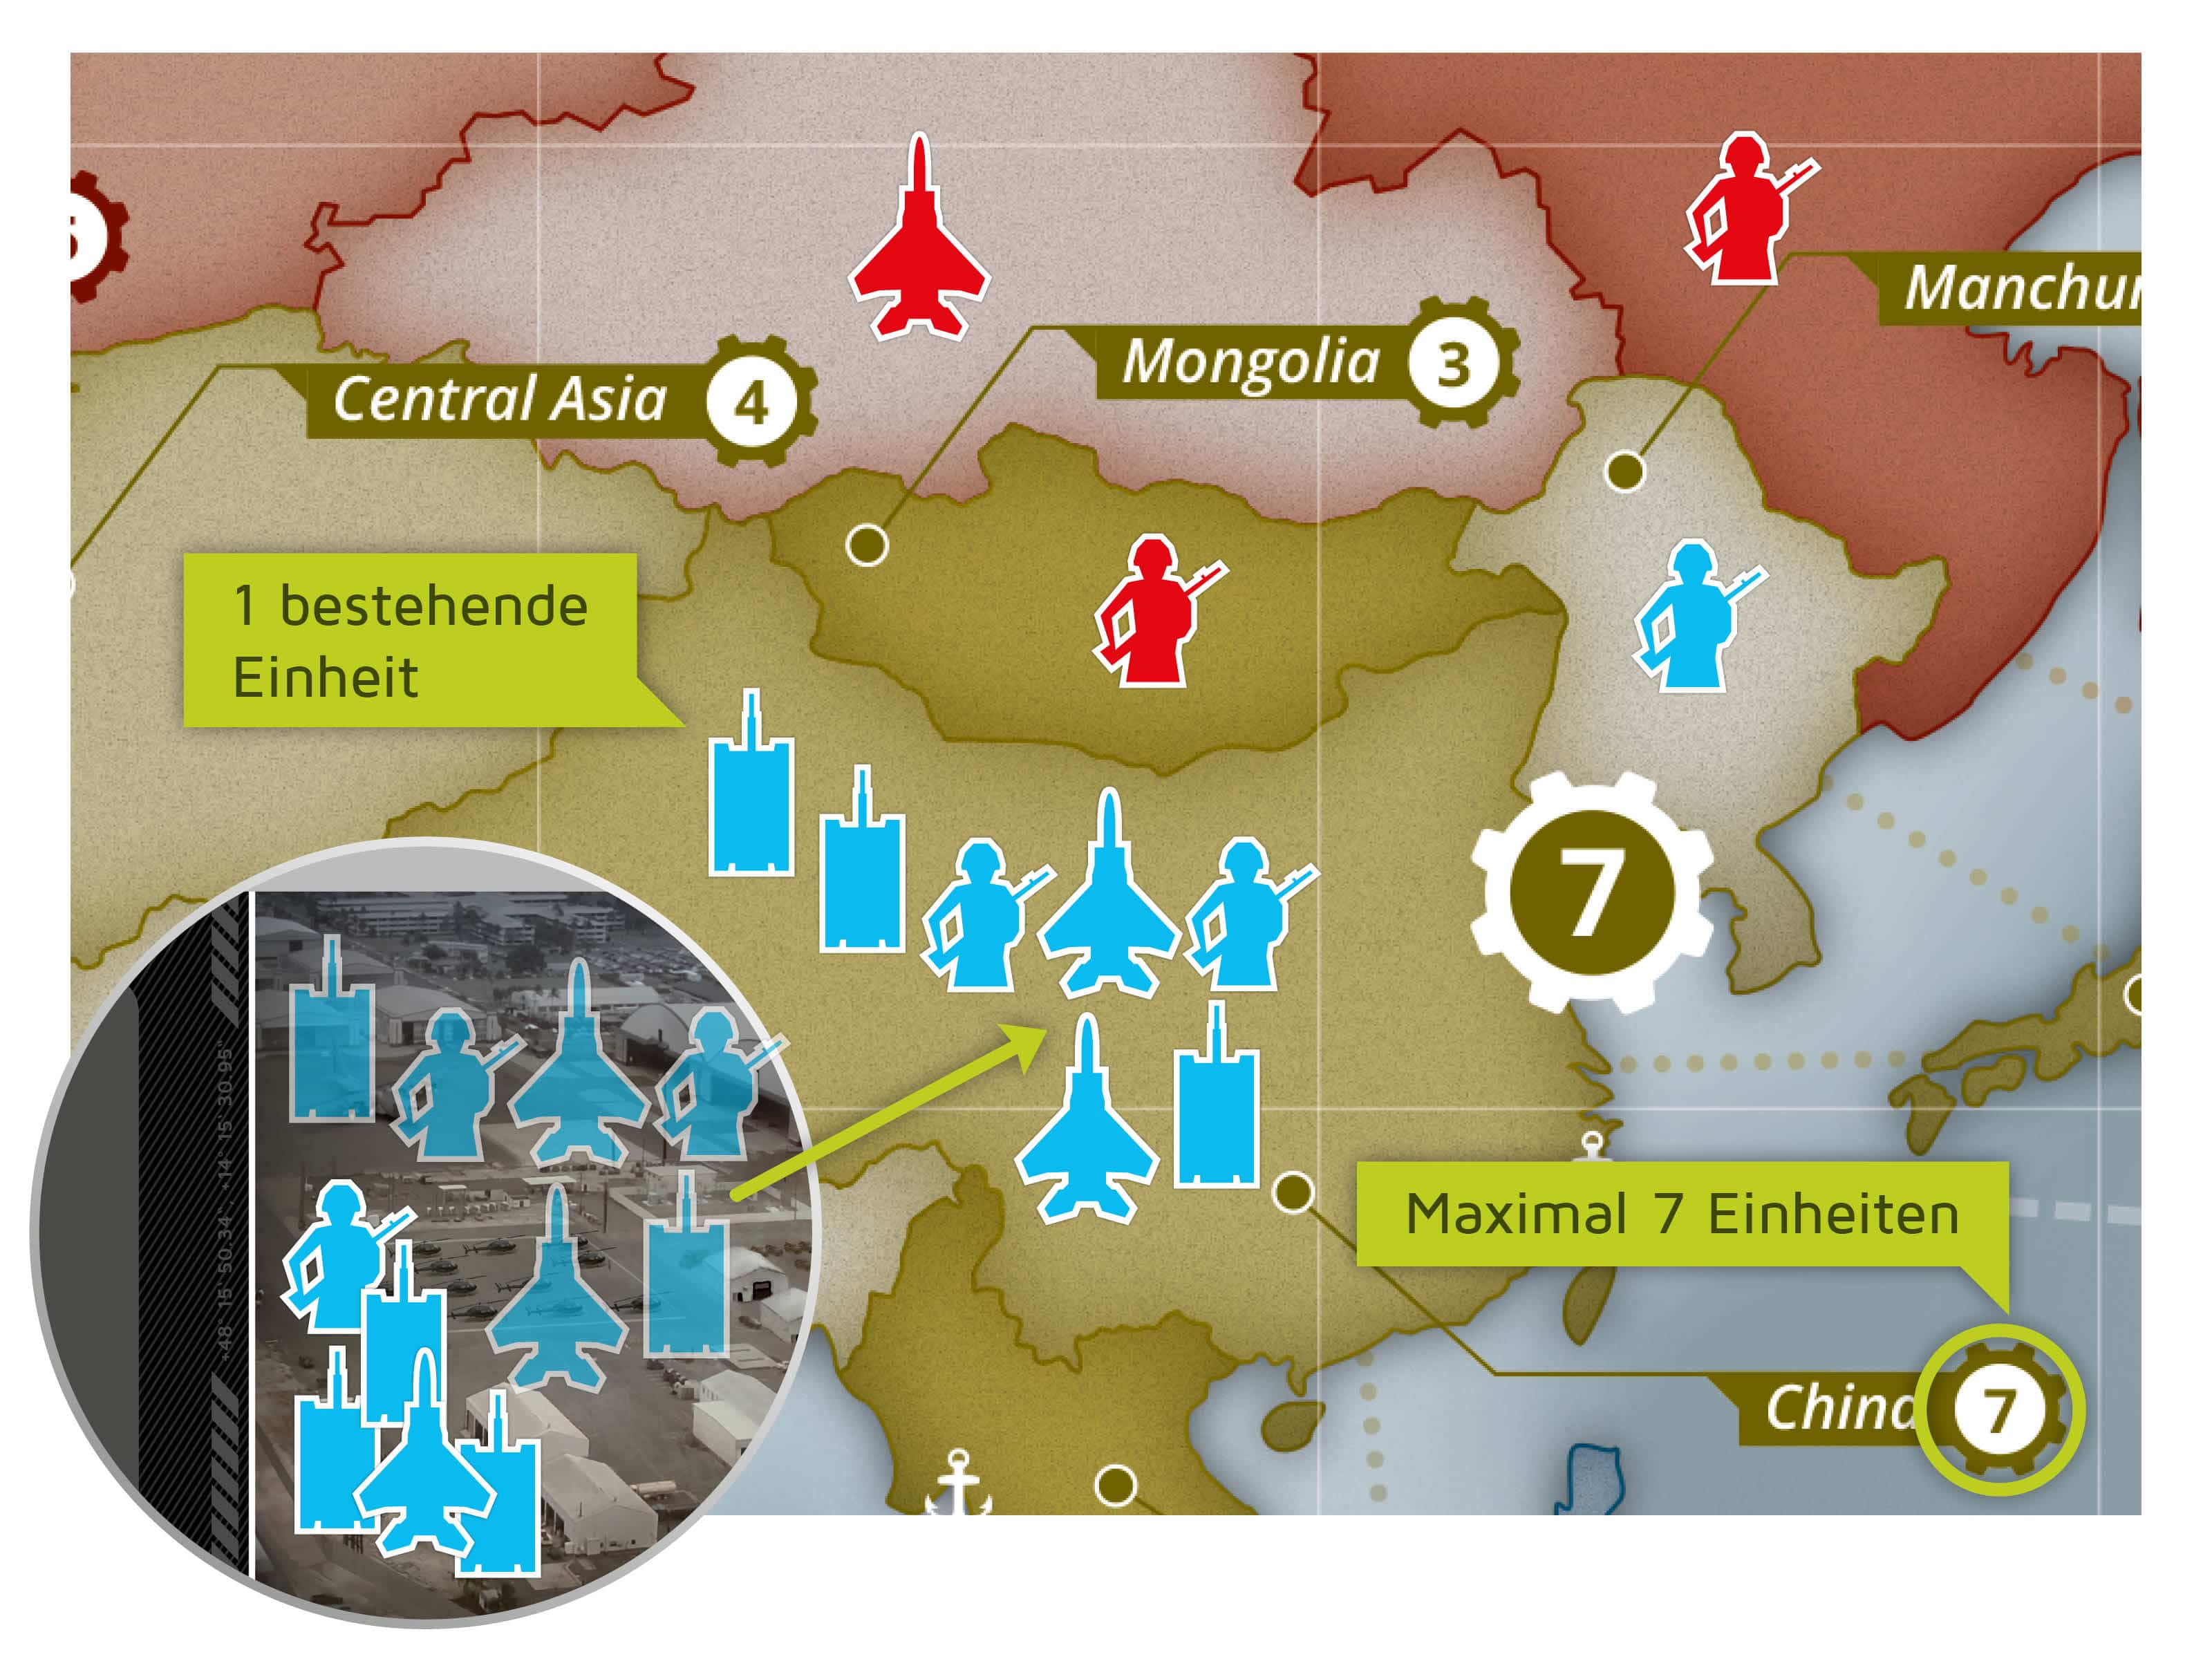
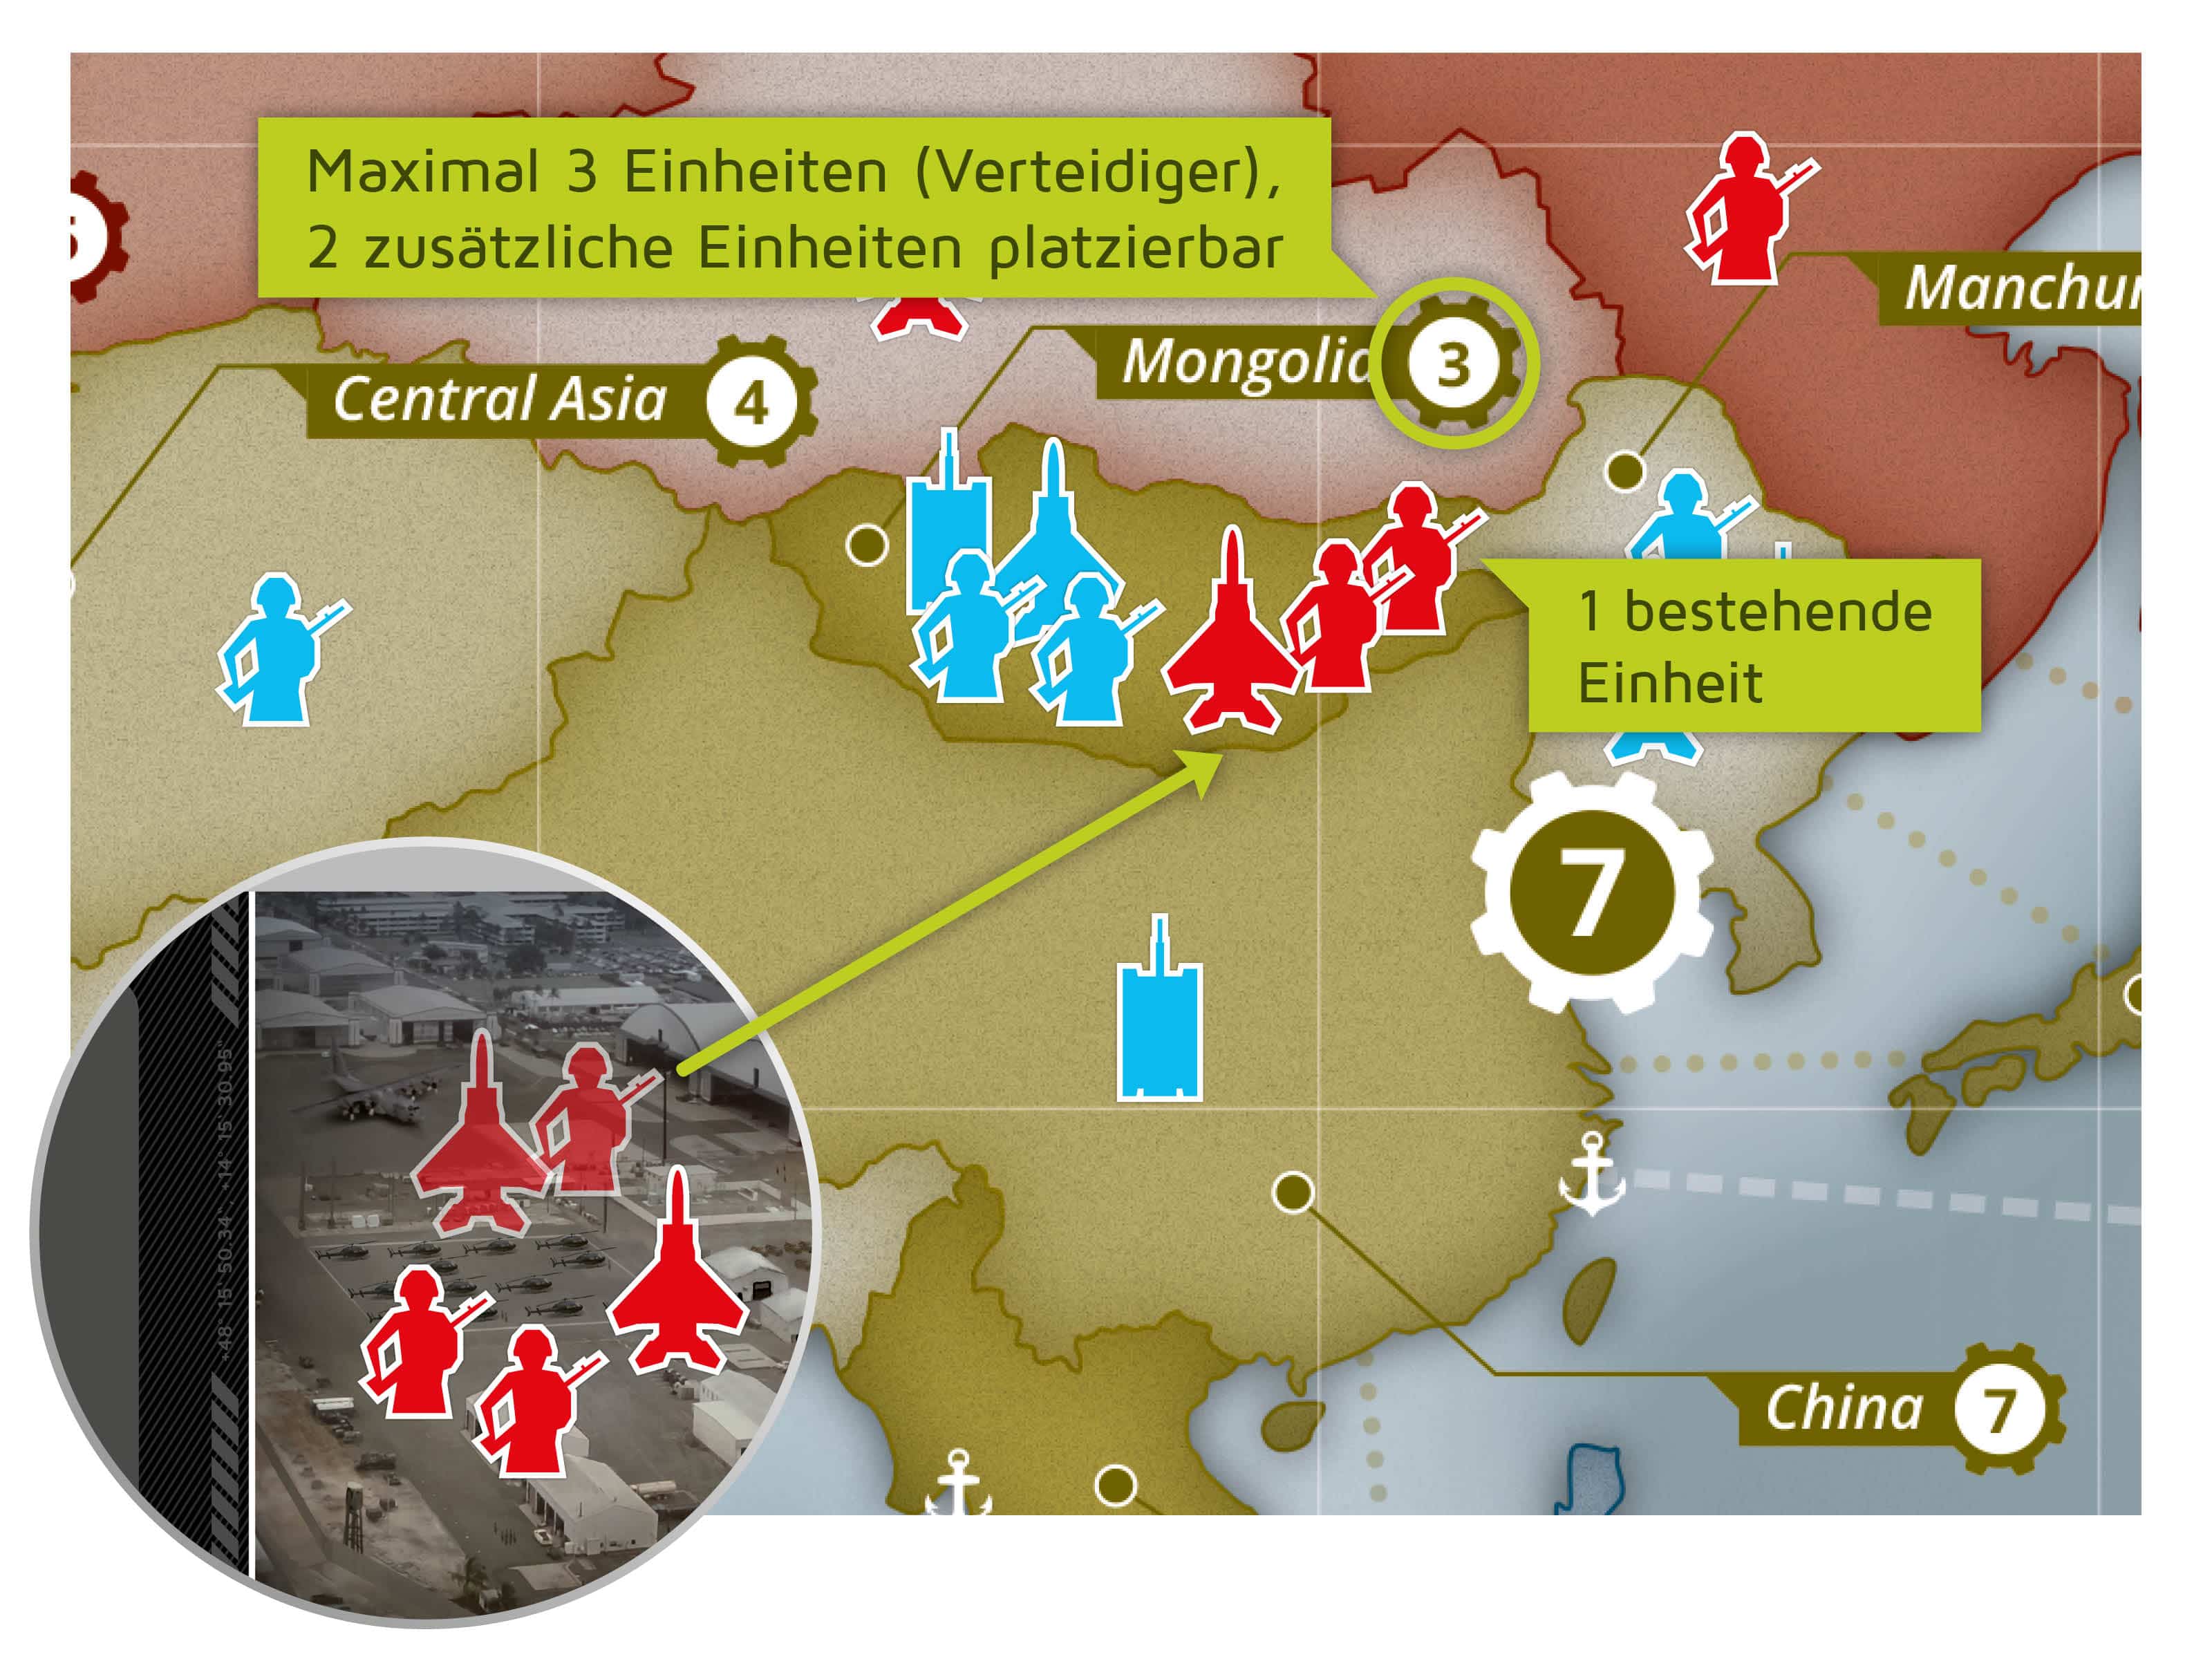
Example “China”
The area “China” is worth 7 production points; this means that a maximum of seven units may be placed in “China”. As the active player alreadyoccupies this area with one unit, he/she may deploy a maximum of six additional units from his/her base camp to this area.
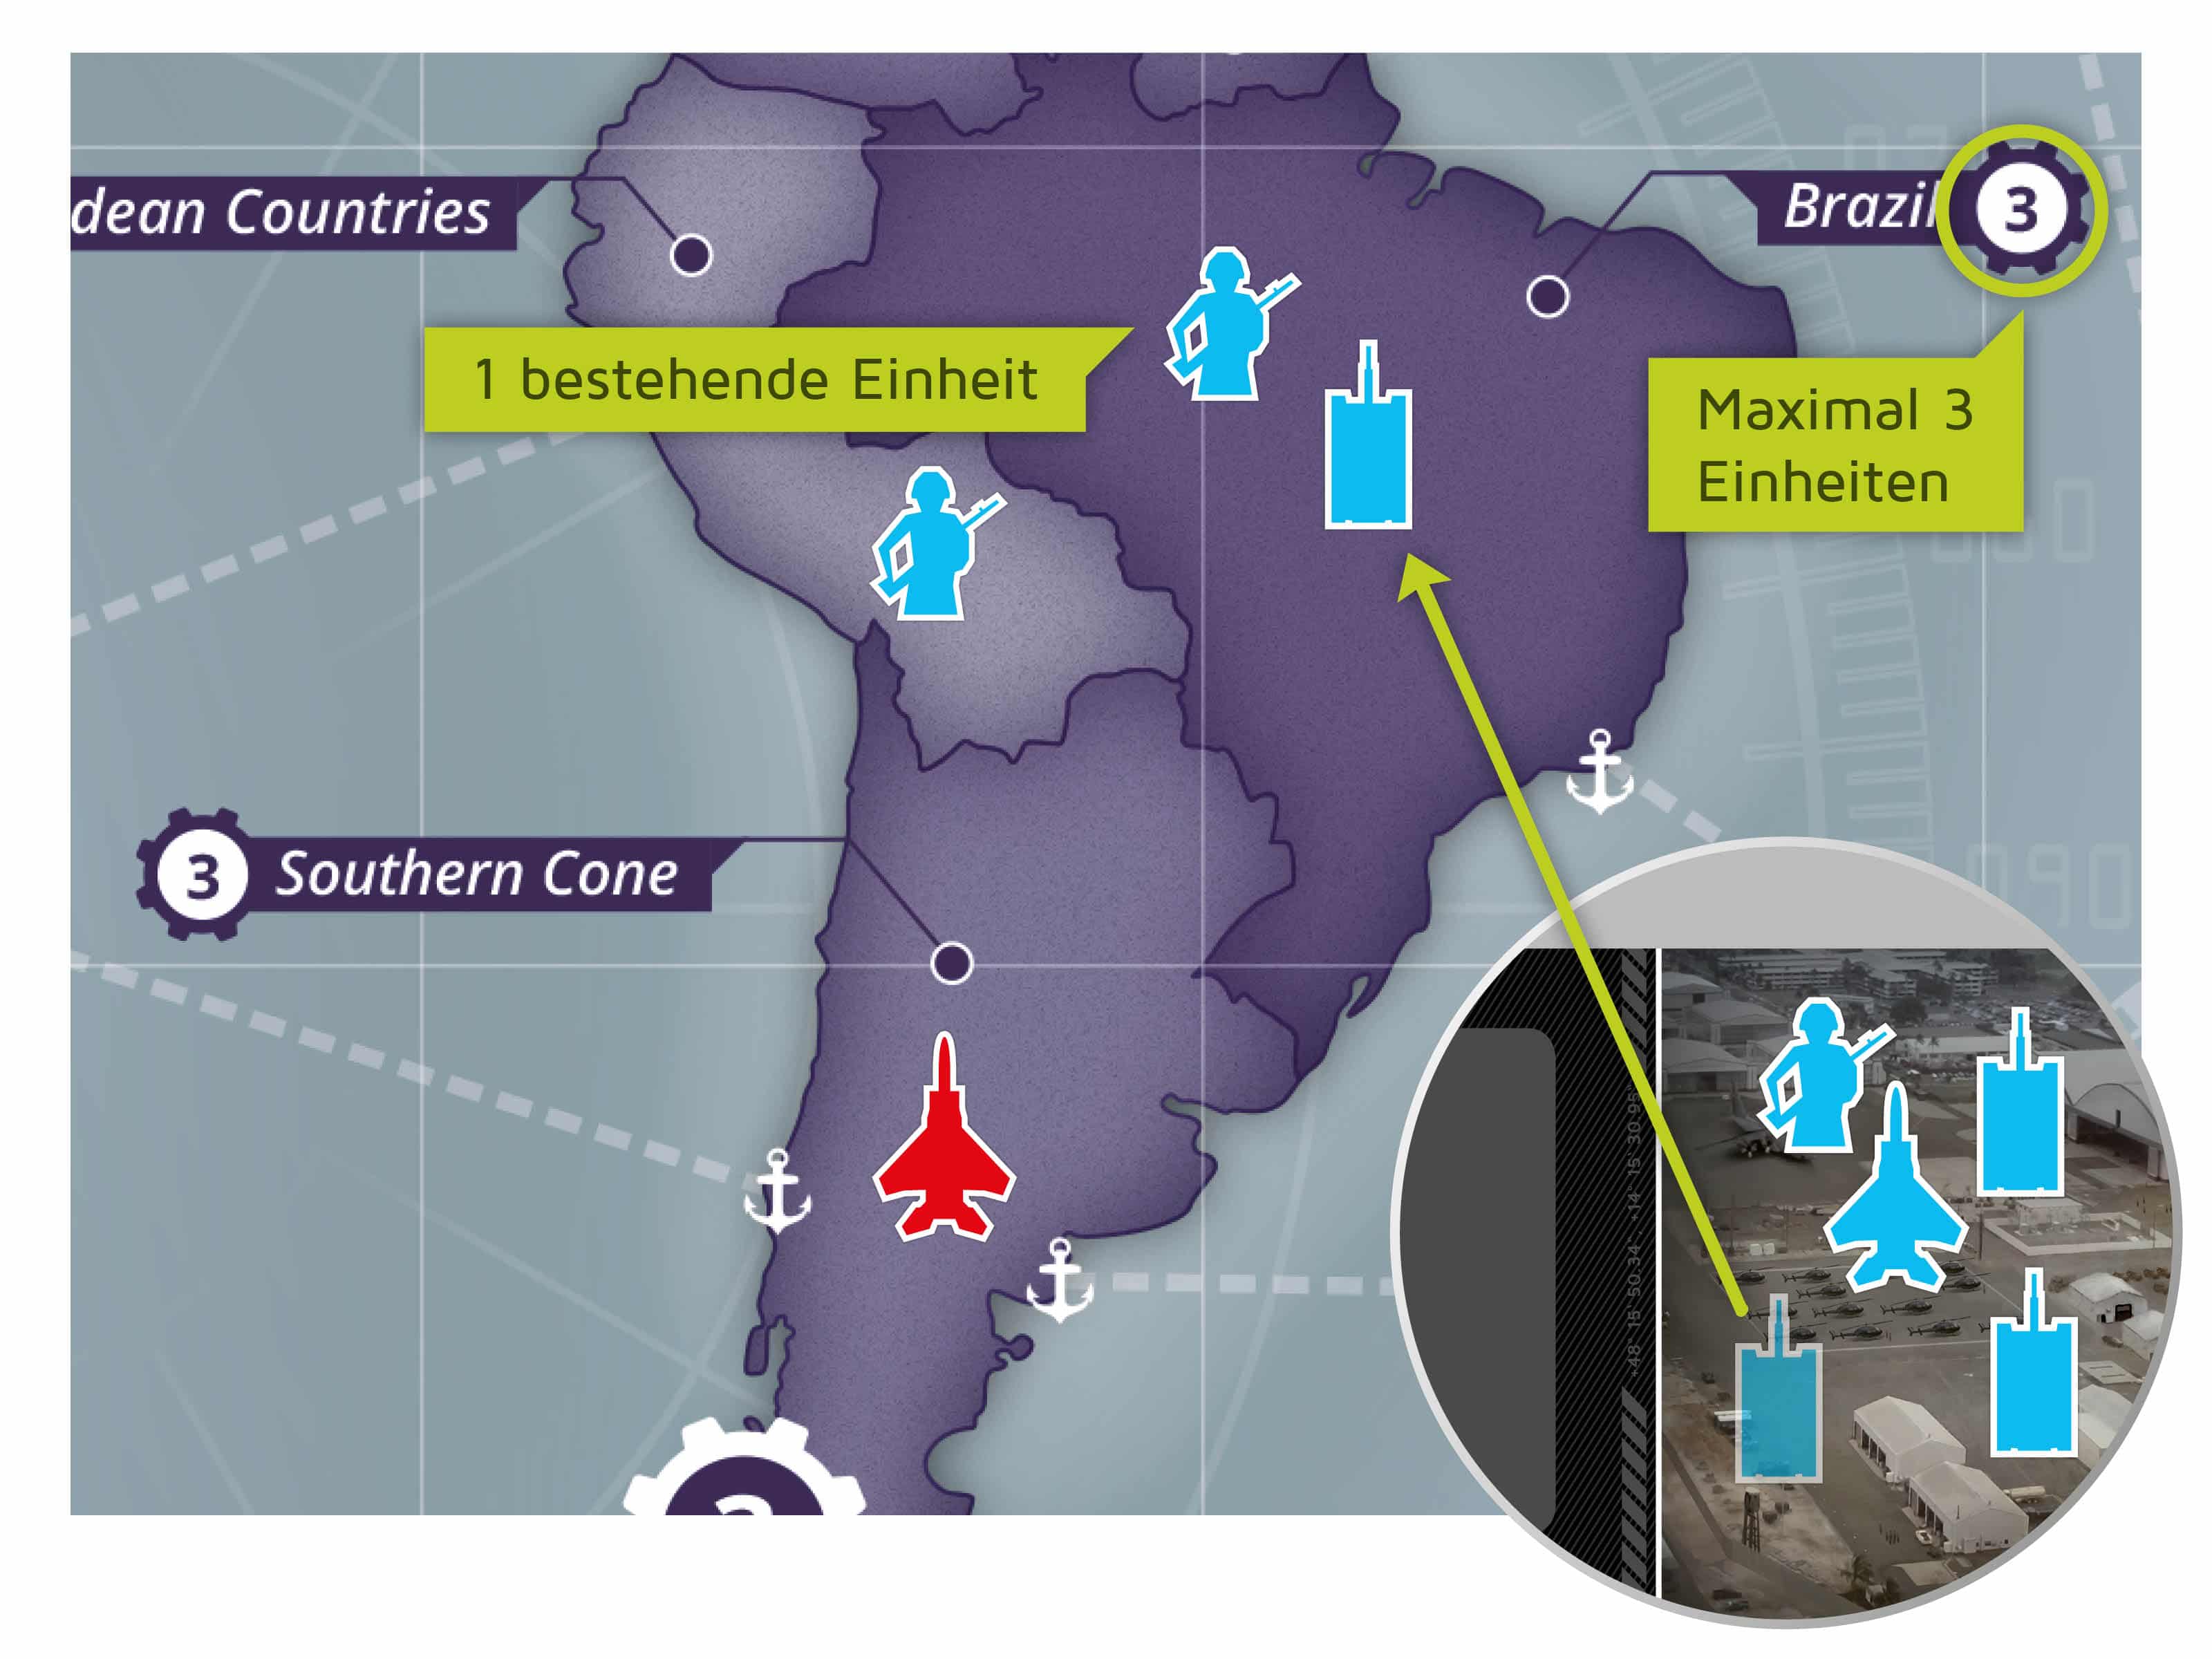
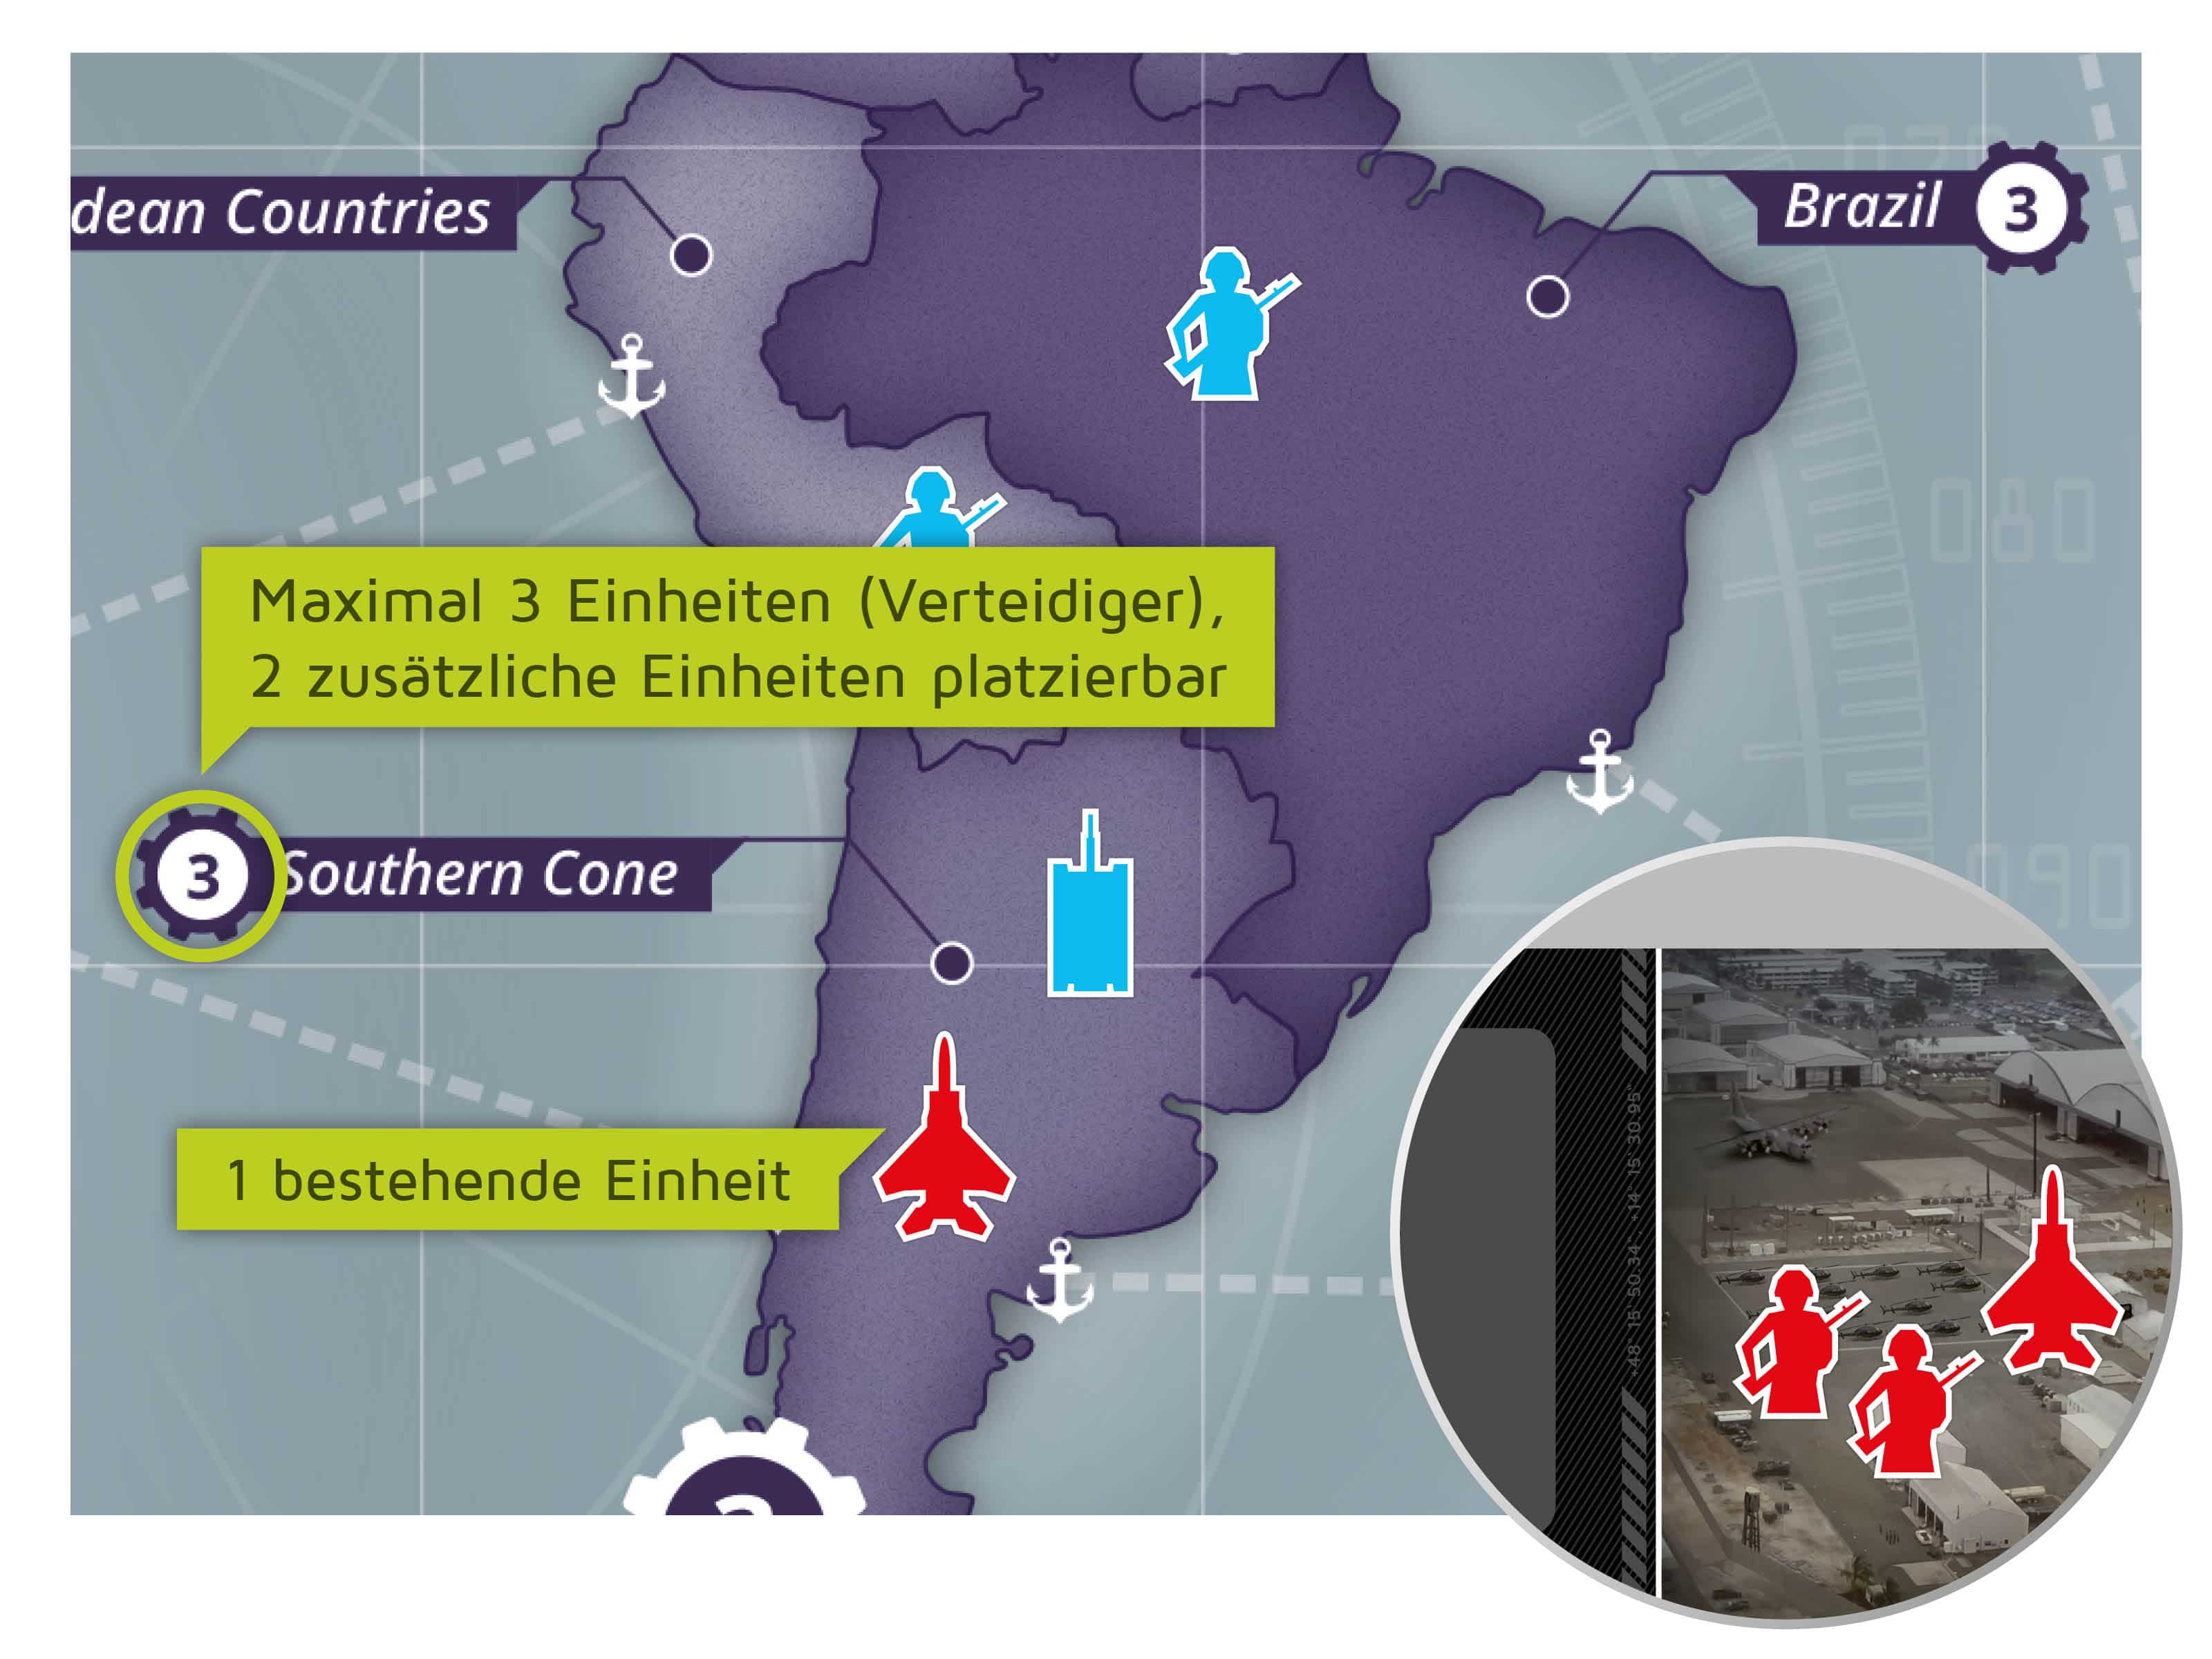
Example “Brazil”
“Brazil” is worth 3 production points; its maximum troop capacity is thus three. The active player already occupies “Brazil” with one unit so he/she may deploy a maximum of two additional units from his/her base camp to “Brazil”
As the active player has already earned several bonuses, he/she decides to attack “Southern Cone”with just one tank unit. He/she removes the corresponding unit from base camp and deploys it to “Brazil”.
The active player moves the units he/she has just deployed from his/her occupied areas into the directly adjacent areas he/she wishes to attack. In this situation, the active player can:
-
Move units from one area to an adjacent area
-
Divide units from one area to several adjacent areas
-
Units from several areas into a jointly adjacent area.
In addition:
-
In each area of the active player, a unit must be left to keep this area occupied.
-
Empty areas can be taken without a fight in this step.
Sea areas (white circle with anchor symbol) are only accessible via areas with an anchor symbol and a white line. For units moving into a sea area, the turn ends immediately.
Note: The maximum number of units per area does not matter when moving.
Important: In this step, the player has to perform all the troop movements that he wants to make, then no more units can be moved!
Tip: Moving units from multiple areas to a shared area can significantly increase the attacking troop strength.
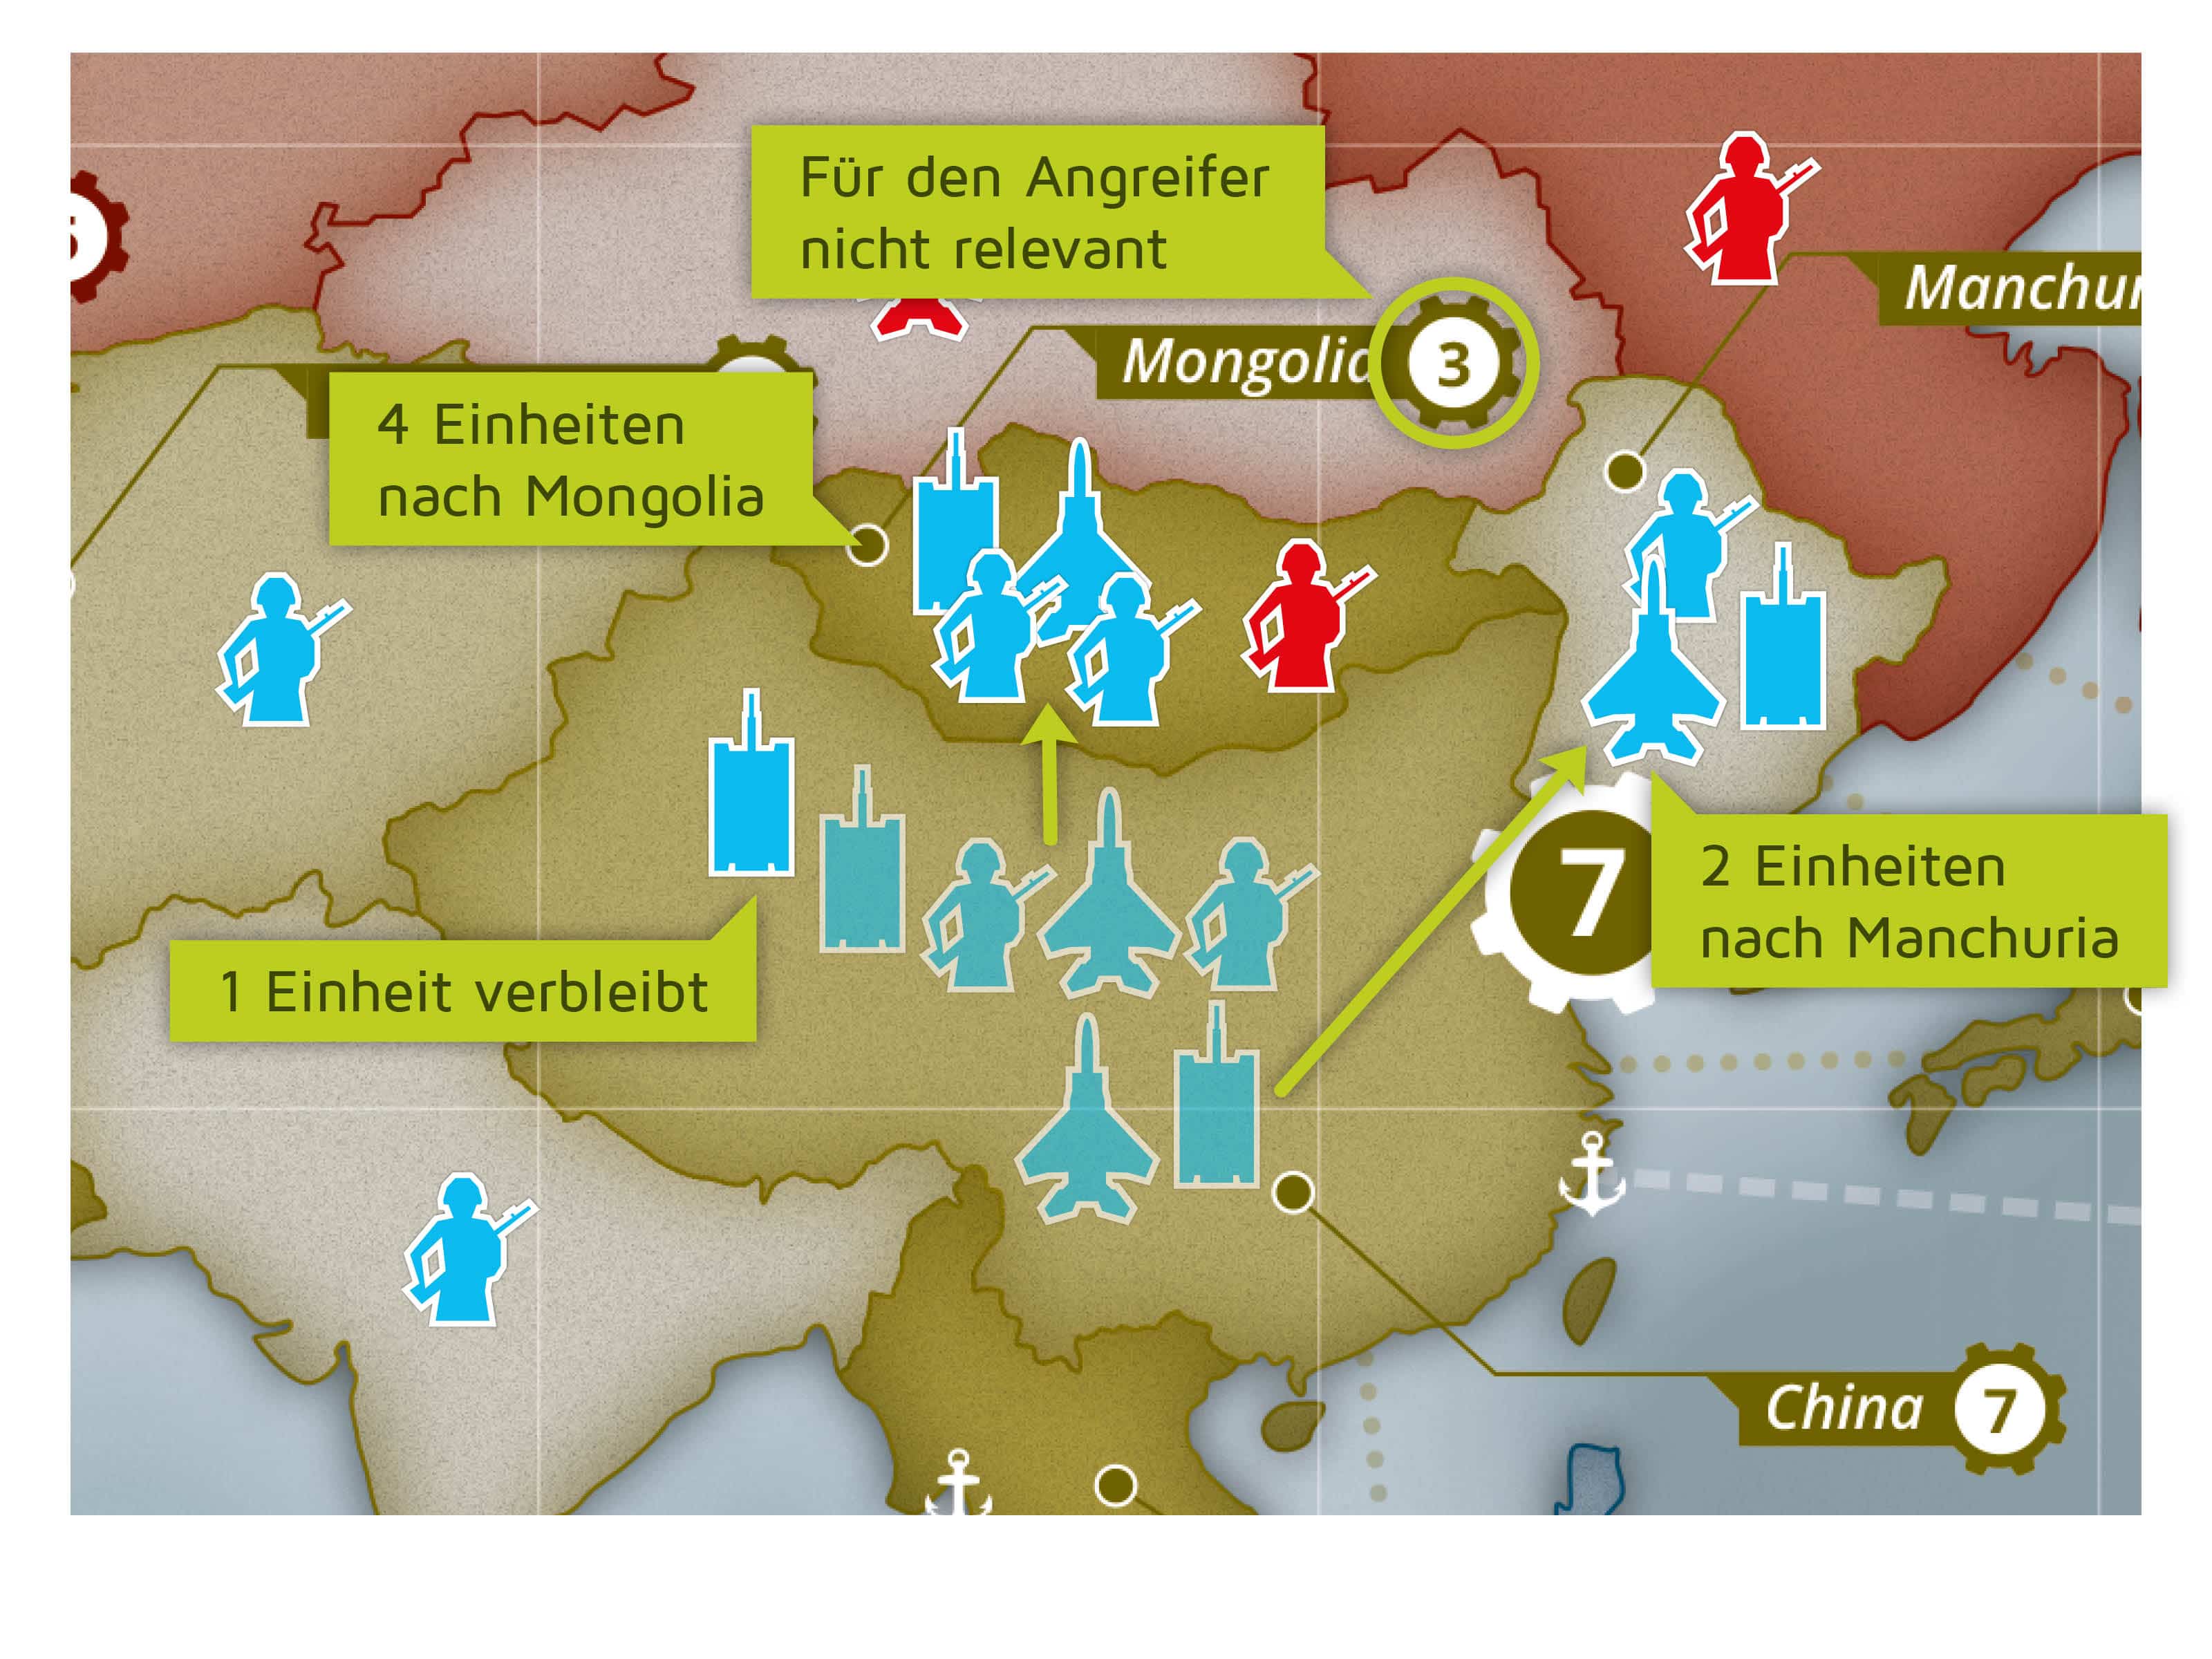
Example „China“
The active player has a total of seven units in “China”. He/she moves four units to “Mongolia” and two units to “Manchuria”. One unit must remain in “China” to keep this area occupied.
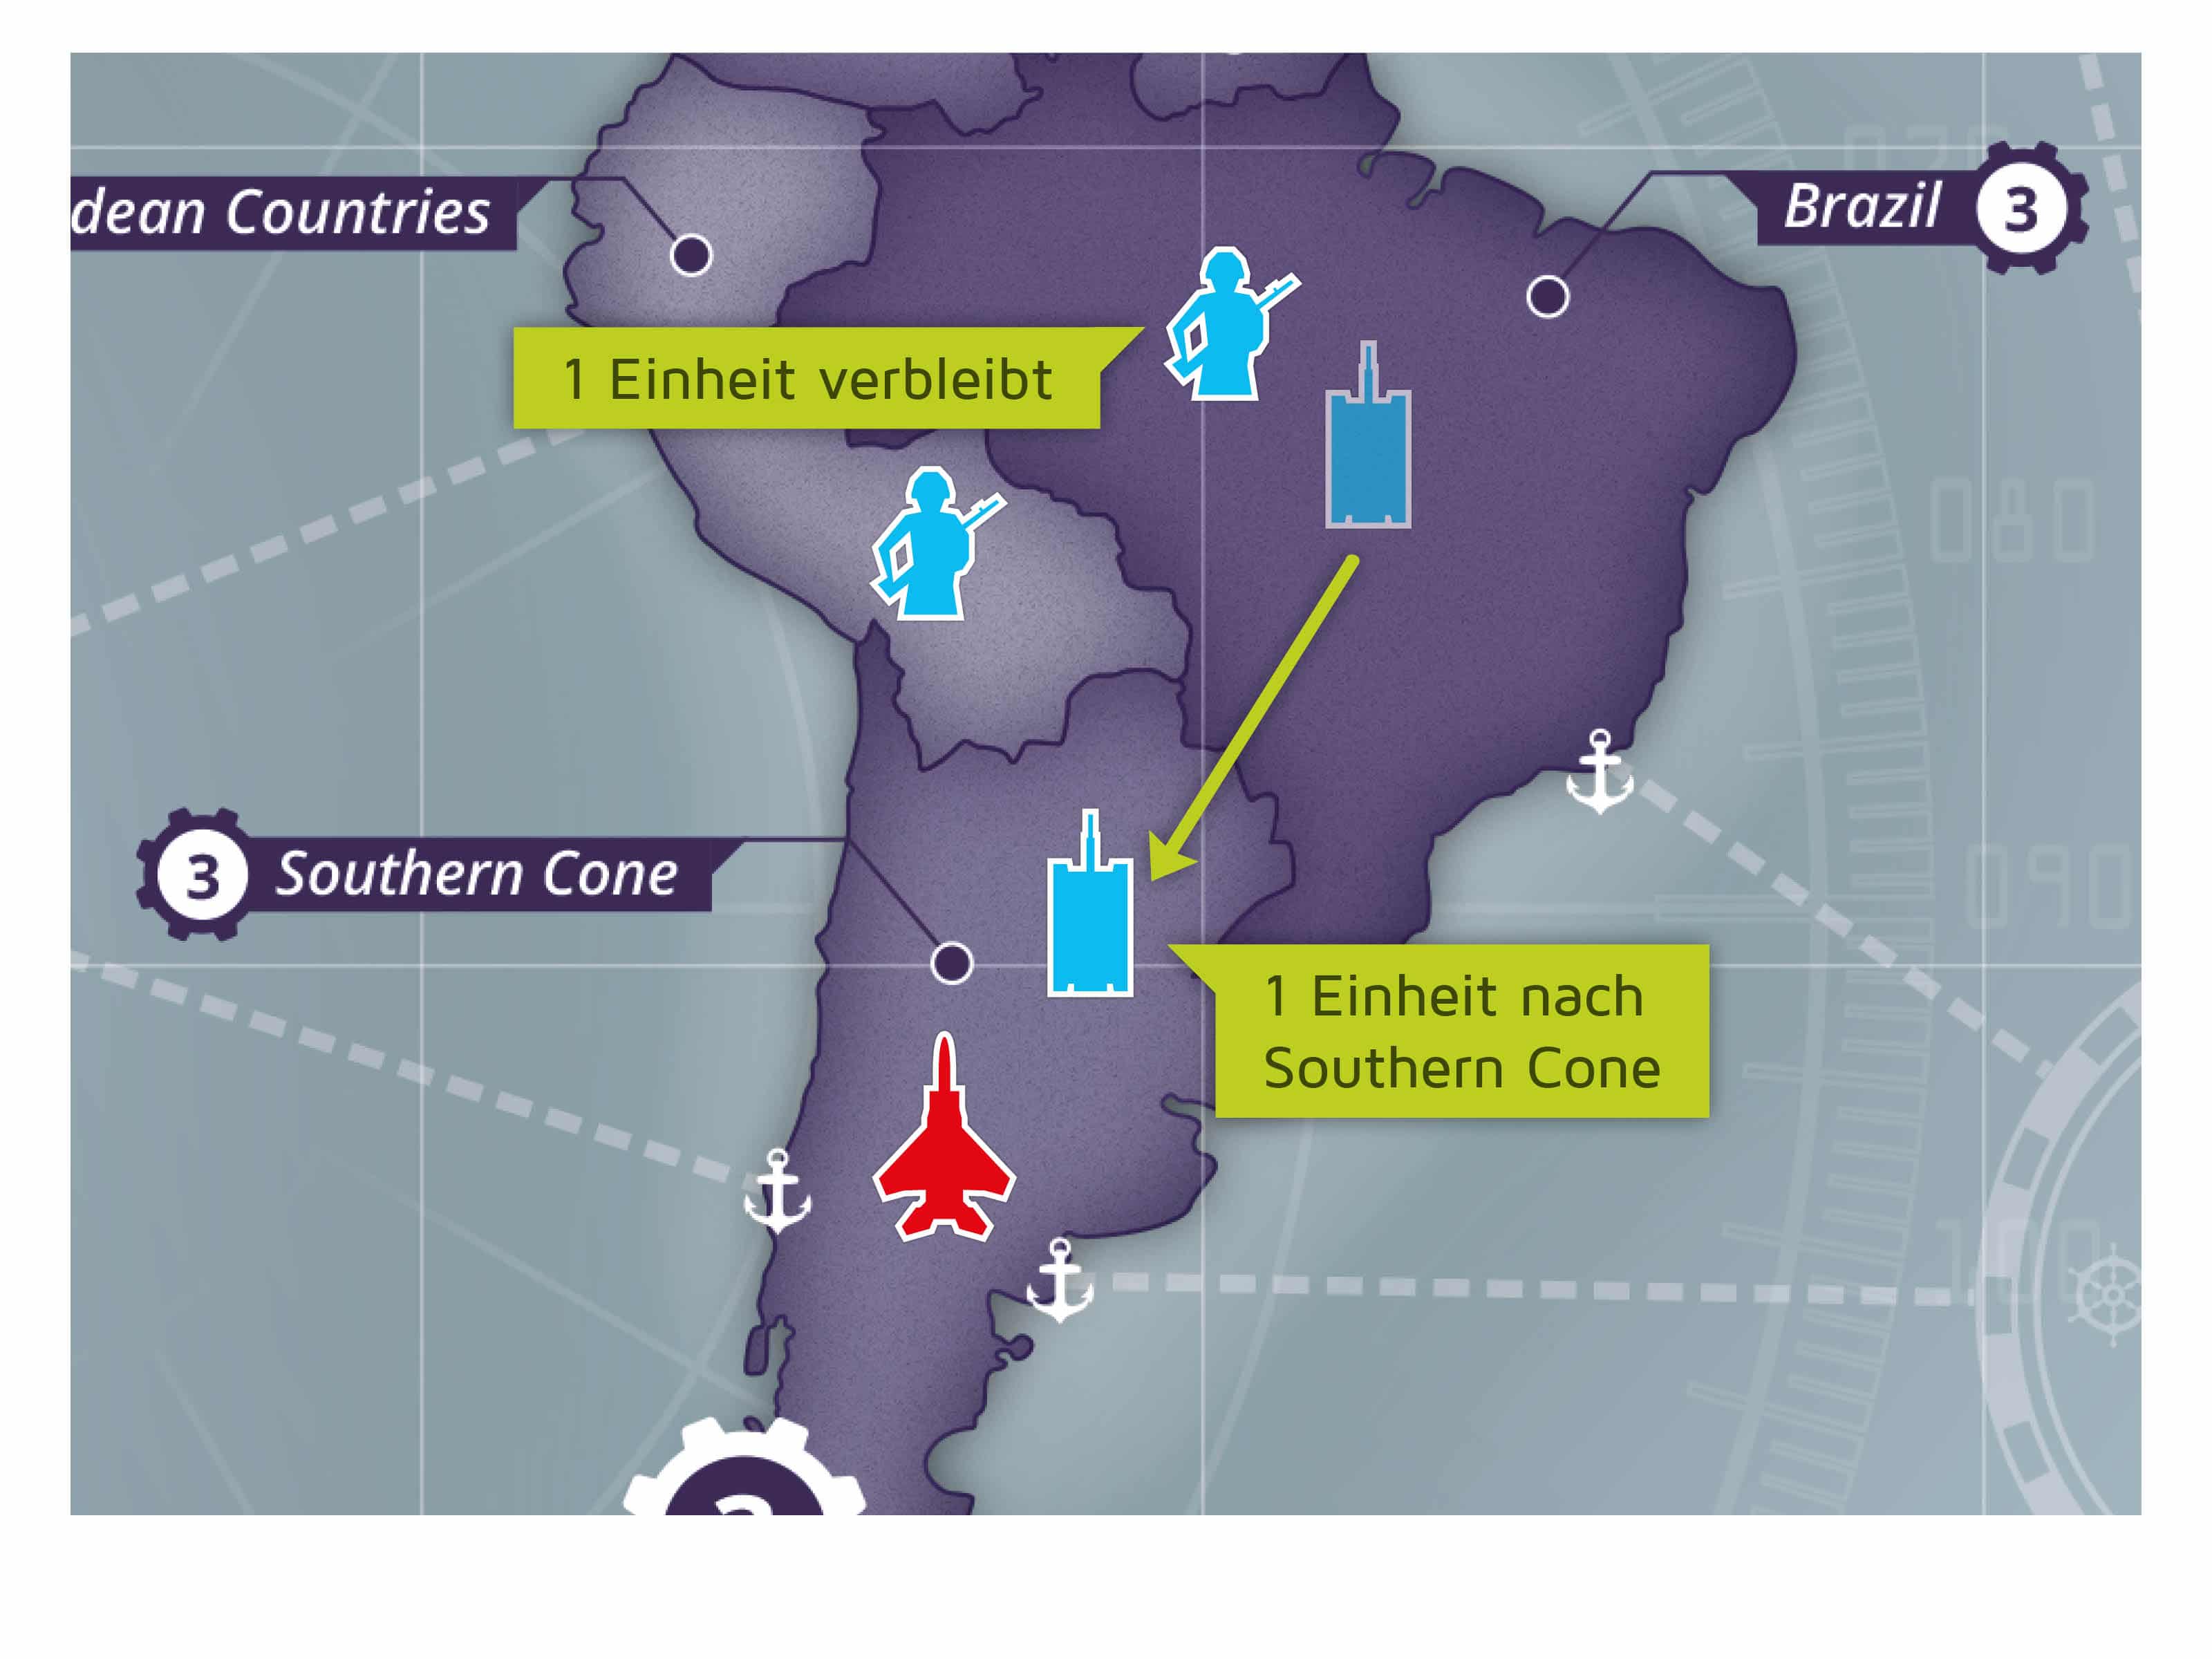
Example „Brazil“
The active player has stationed two units in “Brazil”. He/she moves one unit to “Southern Cone”; the other unit must remain in “Brazil” to keep this area occupied.
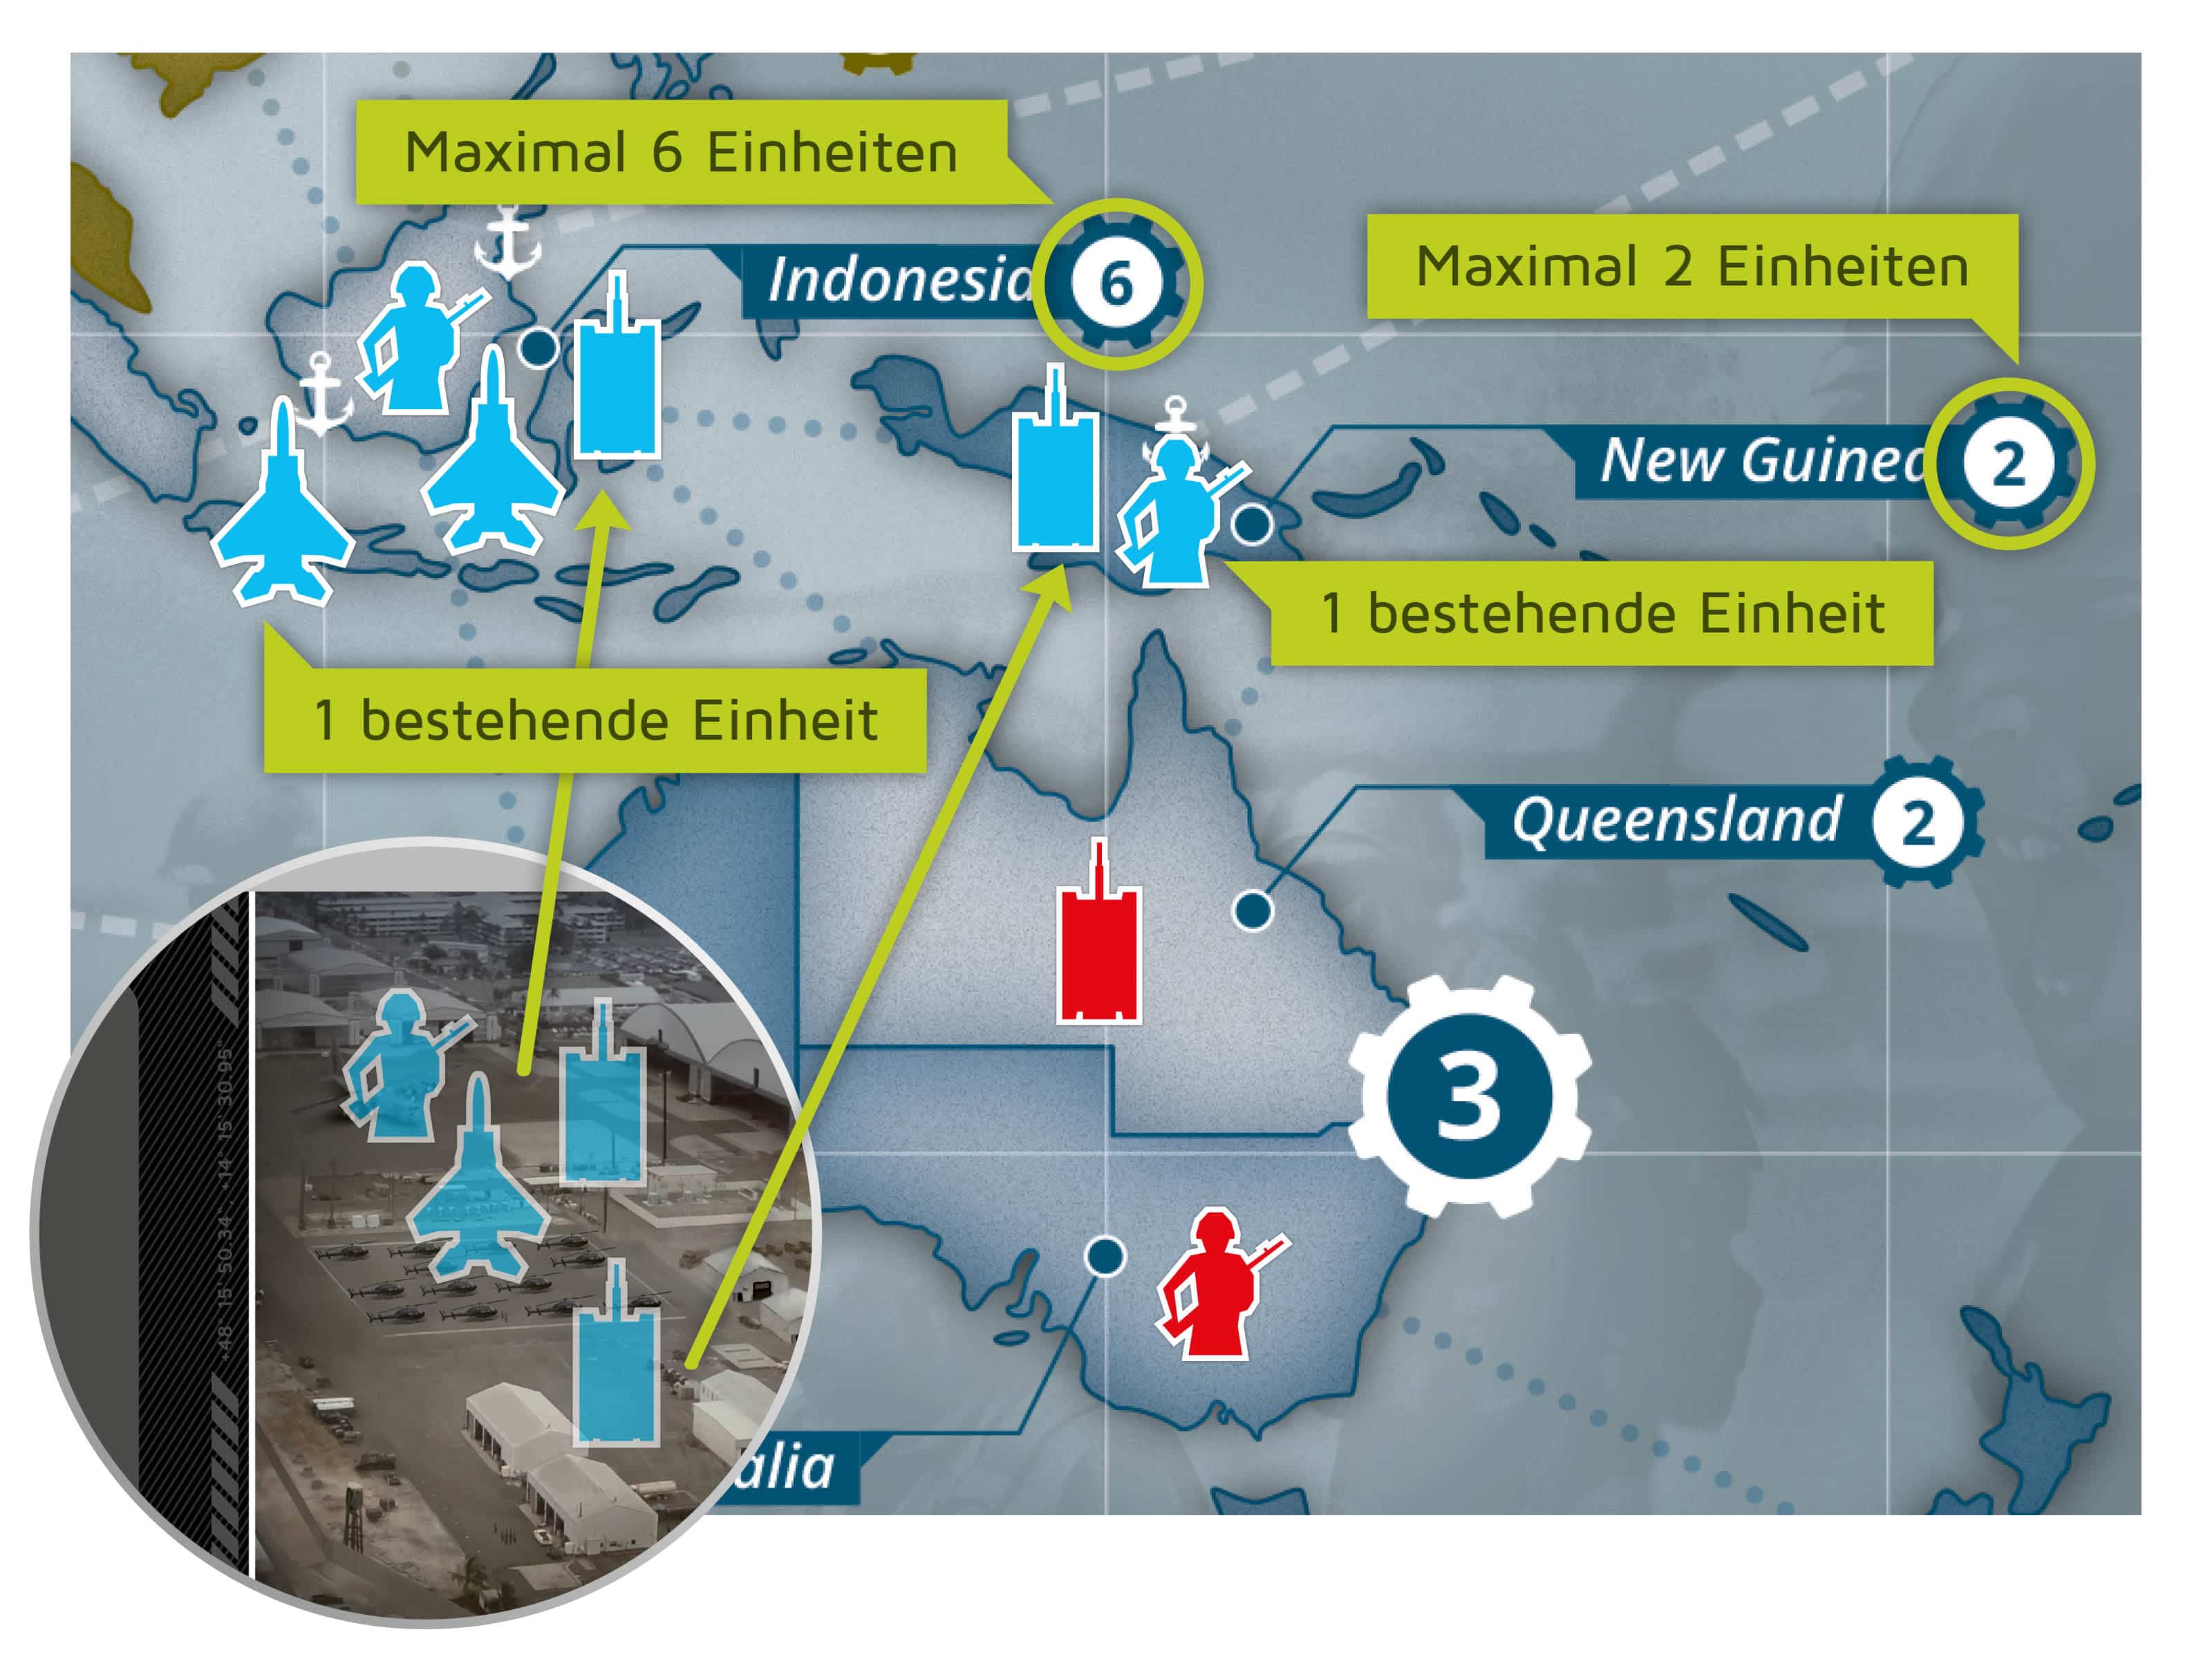
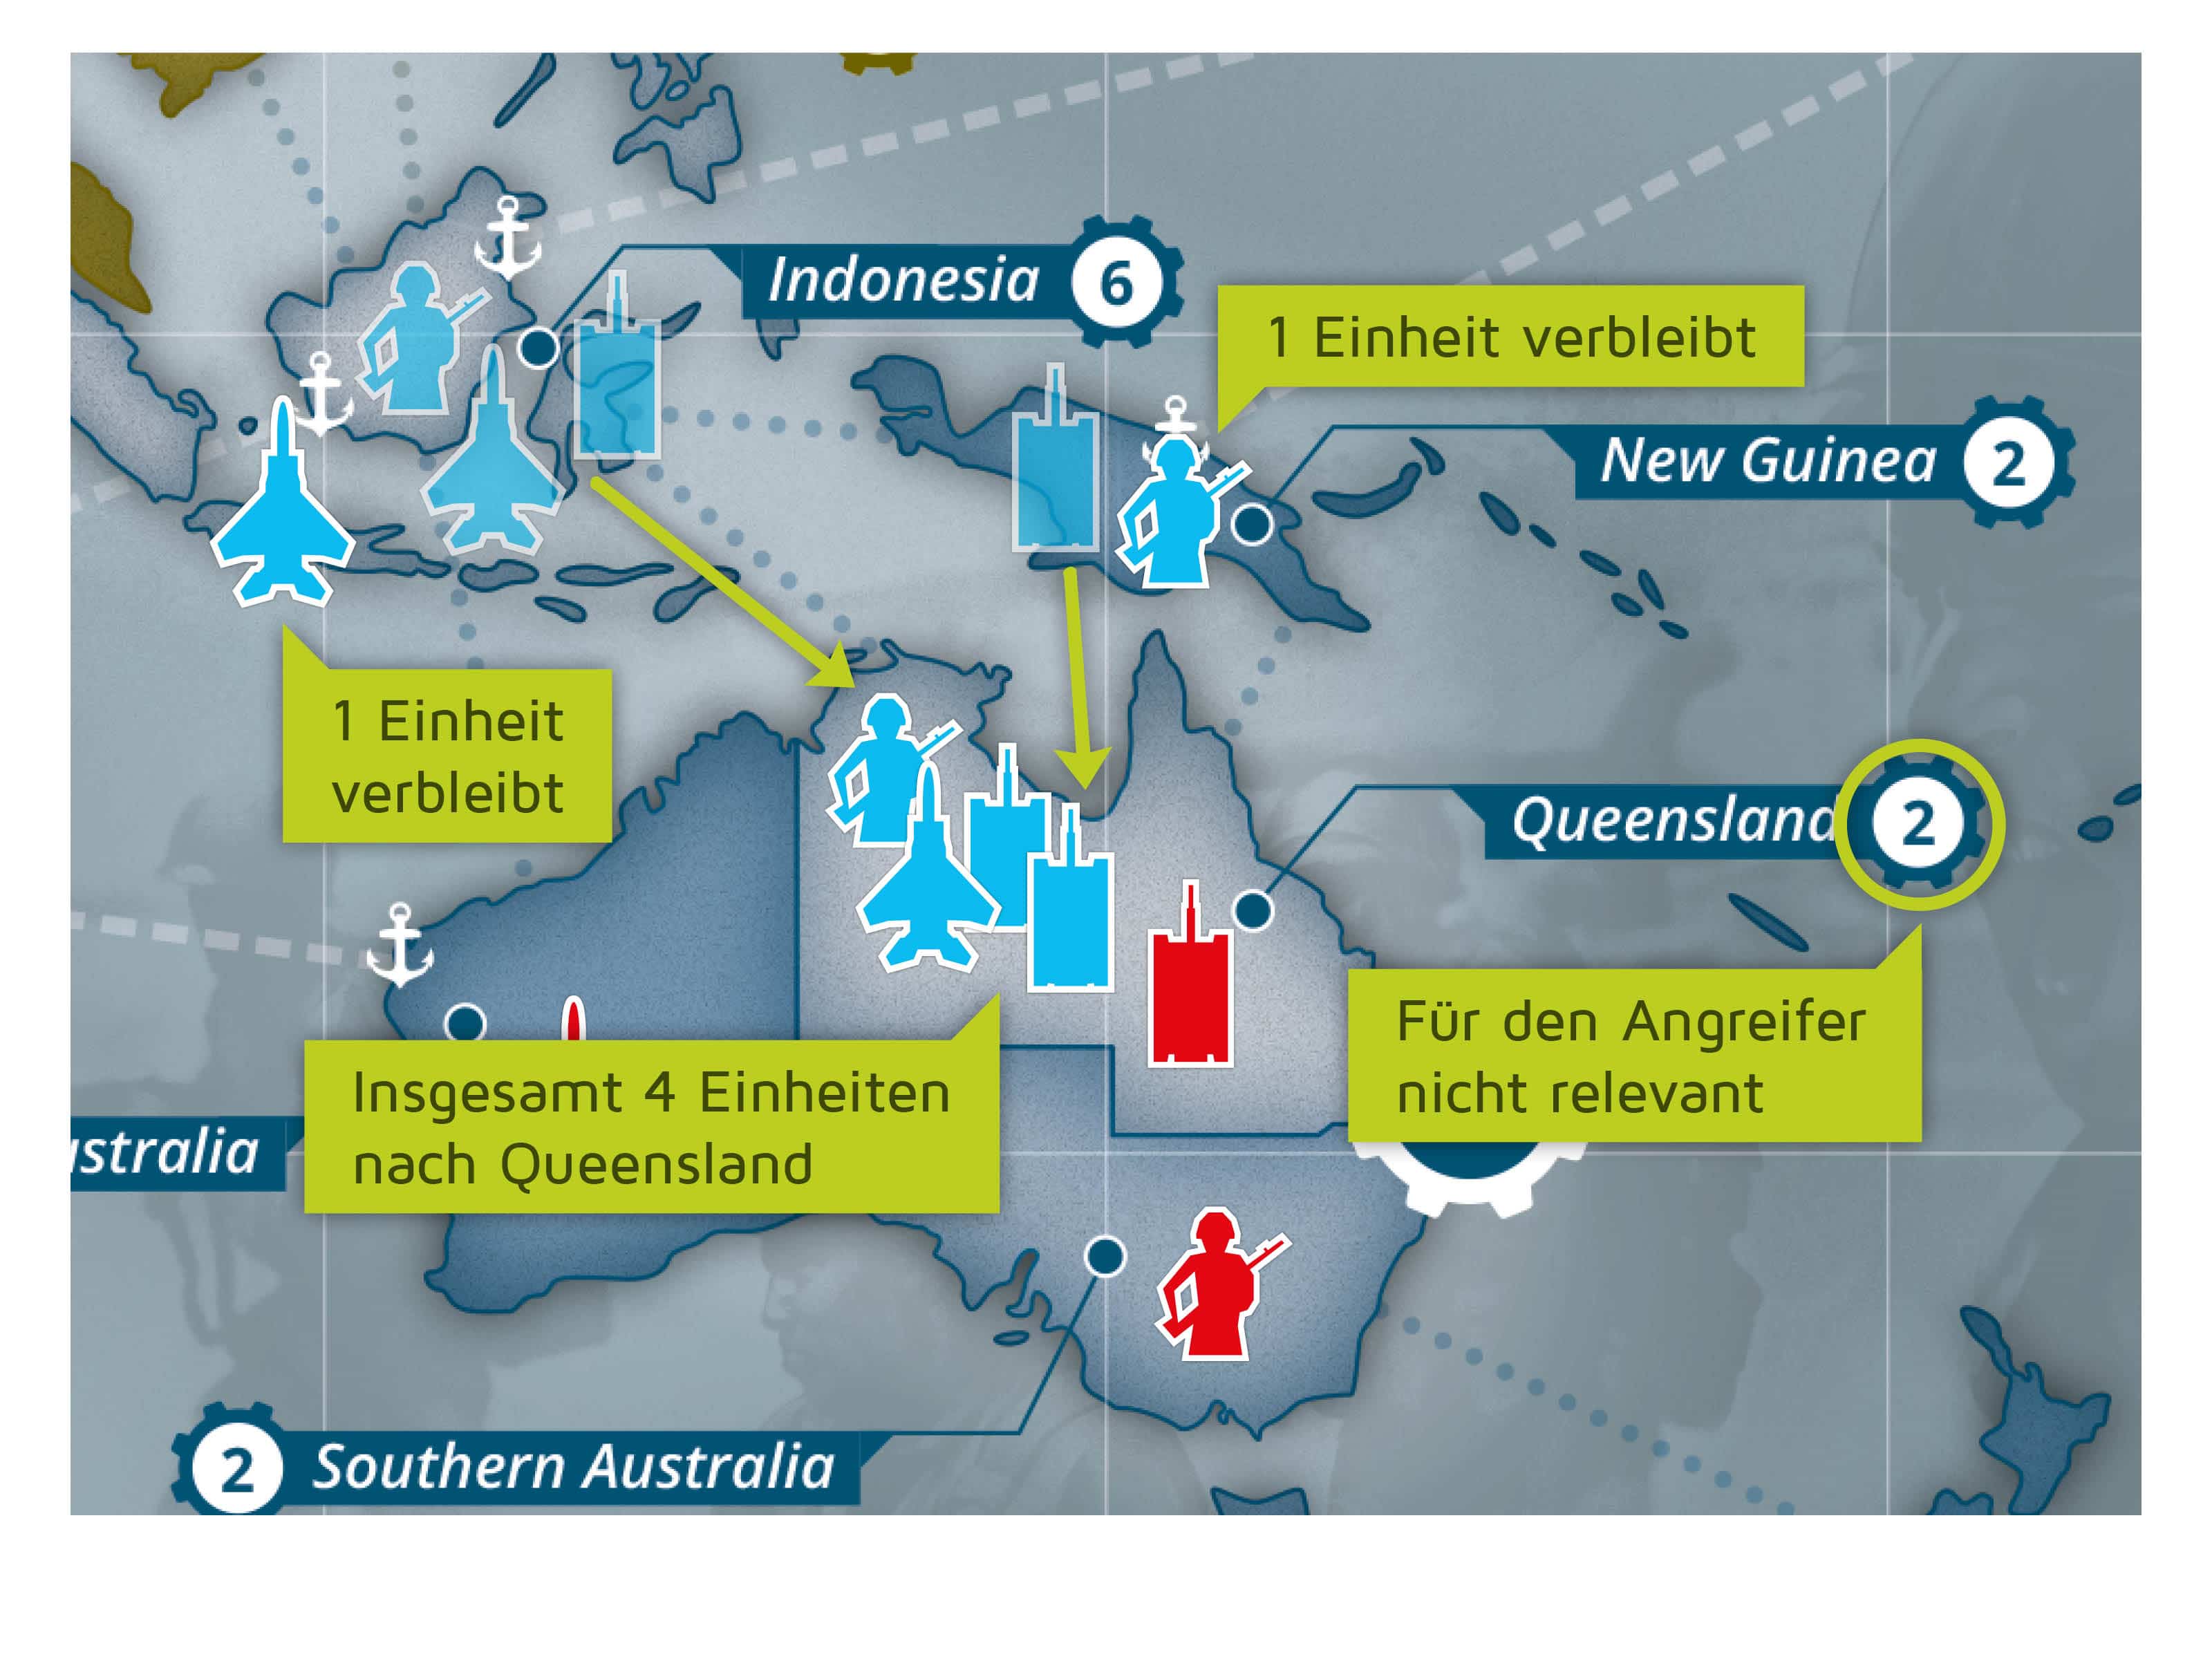
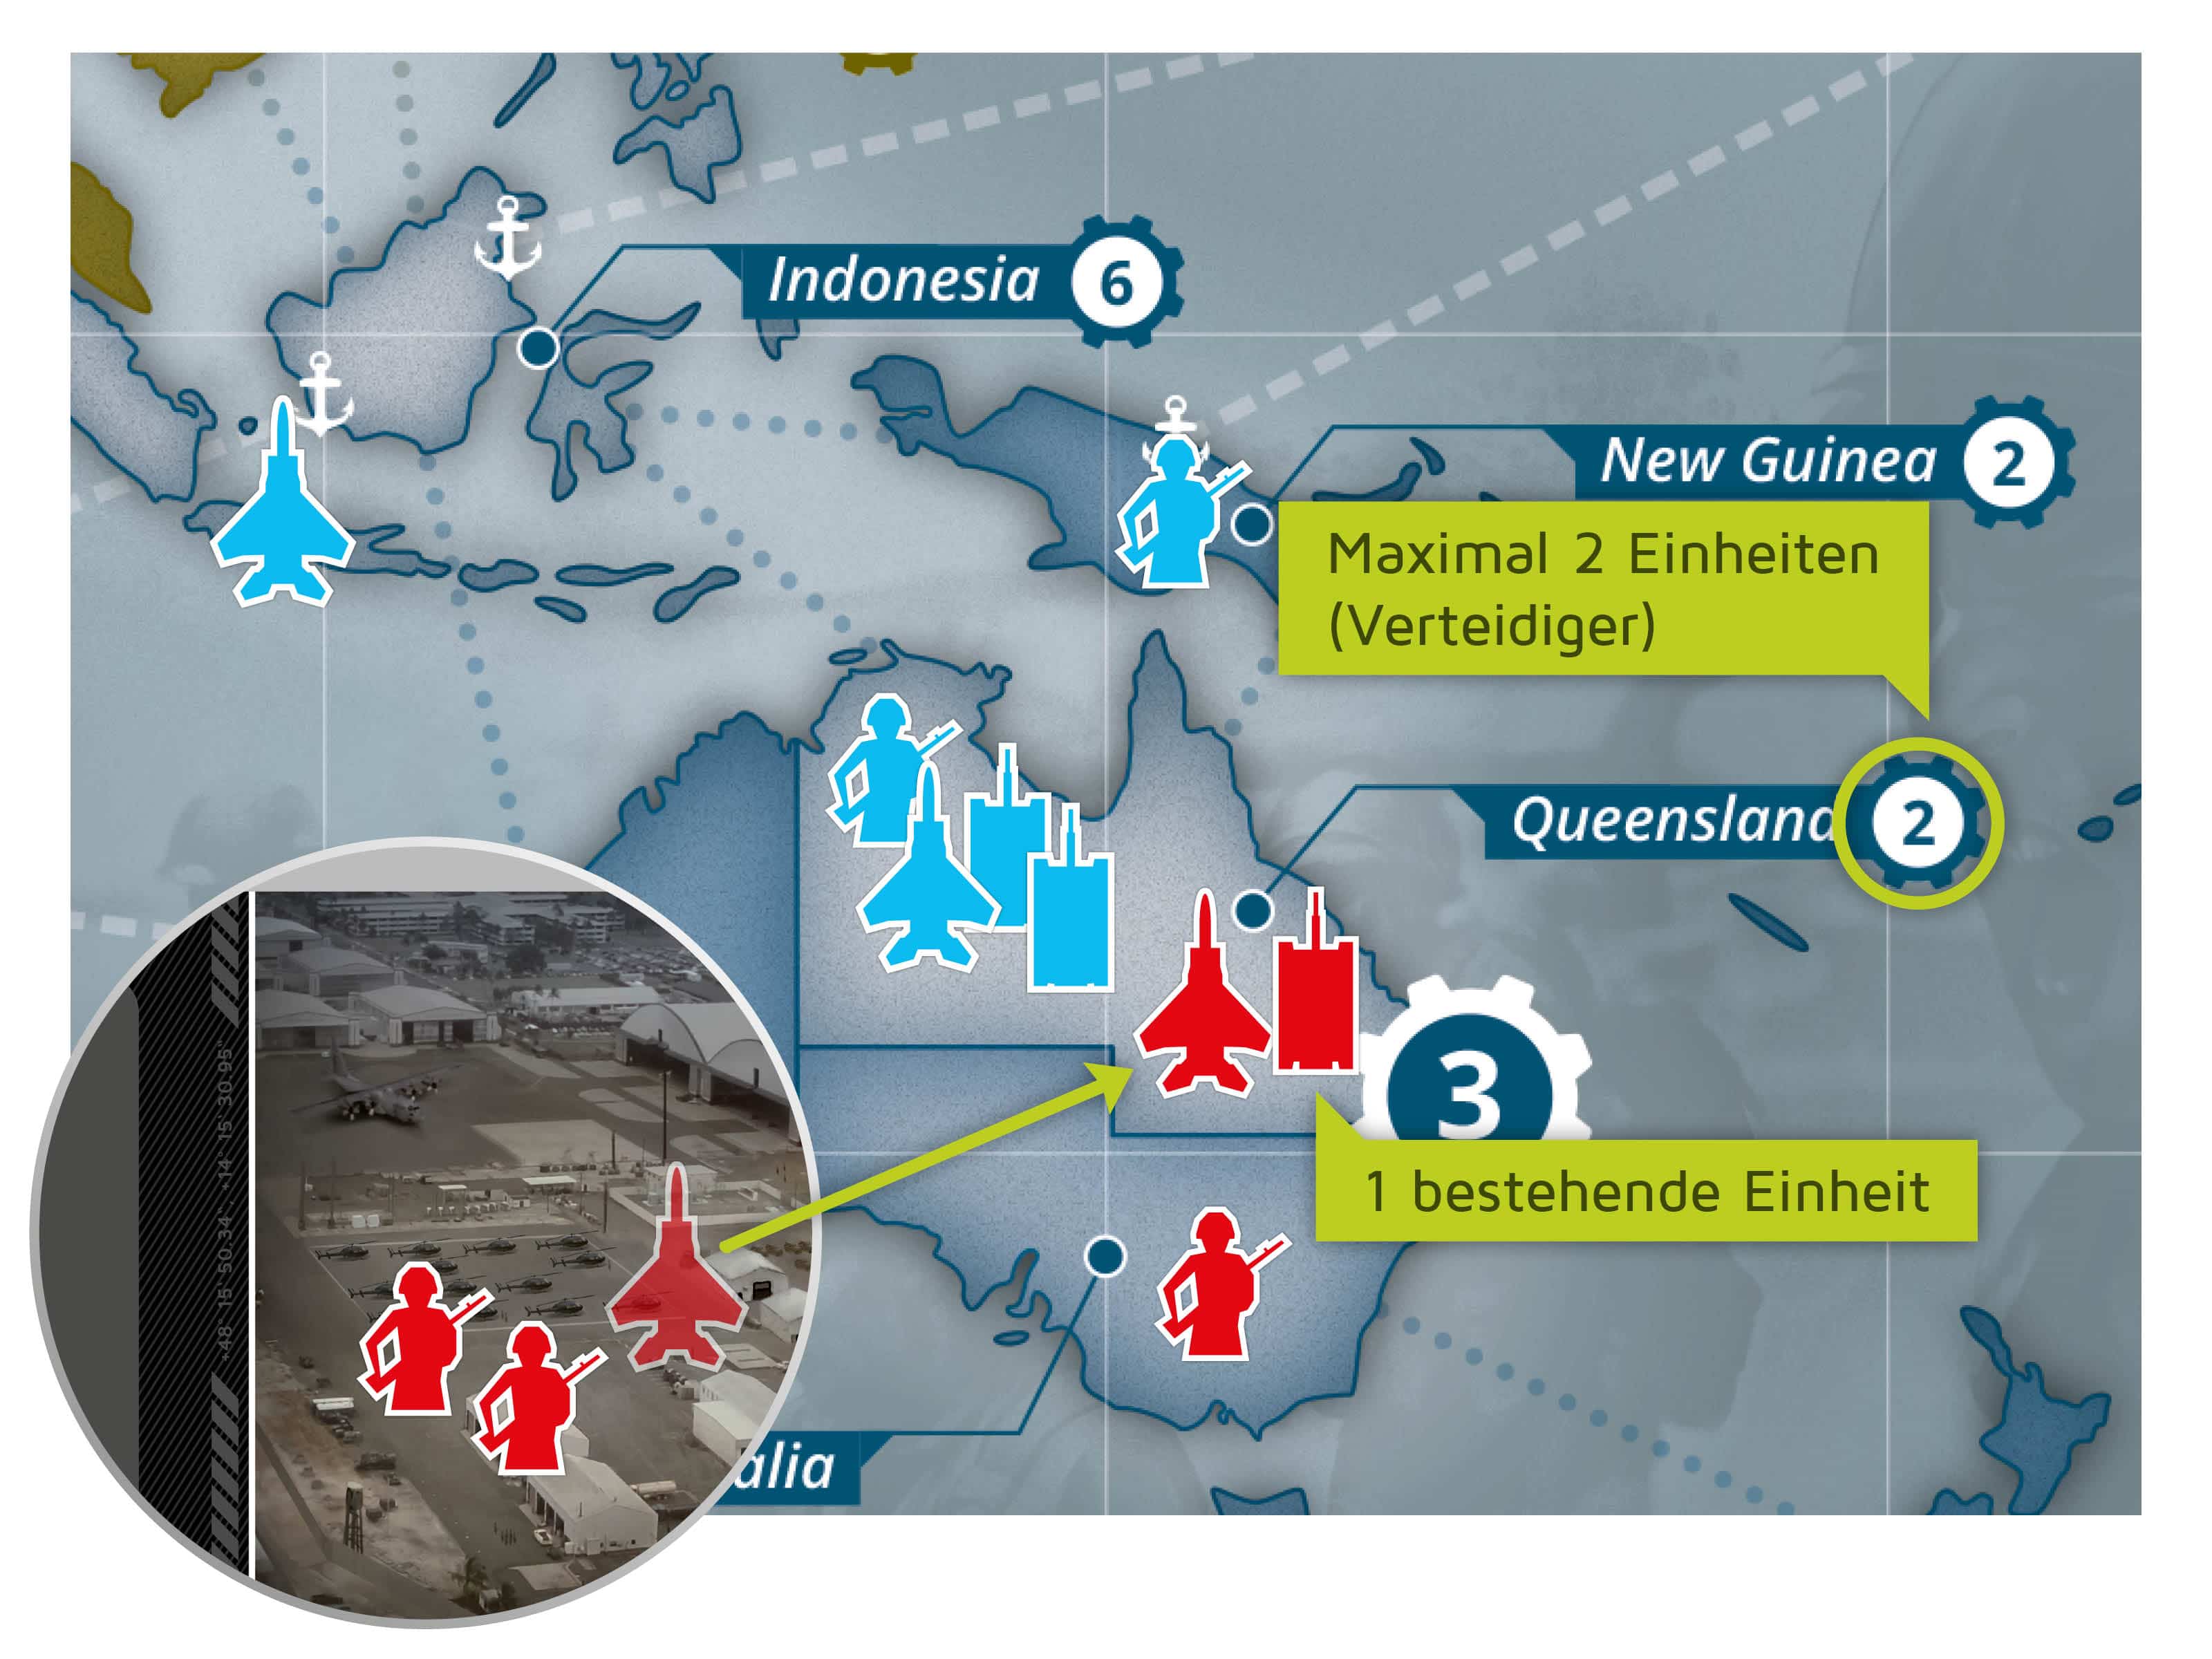
Example „Indonesia and New Guinea“
The active player has four units in “Indonesia” and two units in “New Guinea”. He/she moves three units from “Indonesia” and one unit from “New Guinea” to “Queensland” where he/she thus now has four own units; the player must leave one unit in “Indonesia” and one unit in “New Guinea” to keep these areas occupied.
It is now the turn of the defender (i.e. the player under attack). If there is more than one defender in a round, they will need to organize their defense in sequence one after the other. Each defender may command units from his/her base camp to any of their own areas under attack.
Important: The number of own units of a defender in an area may not exceed the number of production points (i.e. troop capacity) for that area. In sea areas (white circle with anchor symbol) no additional units may be placed for defense.
Tip: It is a good idea for each player to retain a few units in their base camp to use for defense in case he/she is attacked.
Example „China“
Player 2 (defender) is attacked by four units in “Mongolia”, by one unit in “Southern Cone” (see image below) and by four units in “Queensland” (see image at bottom). Player 2 has five units in his/her base camp.
Player 2 commands two units to “Mongolia”. As the player already has one unit in “Mongolia”, he/she has thus reached the maximum troop capacity for this area.
Example „Brazil“
The player seems to be less interested in “Southern Cone”; he/she does not command additional units to this area and leaves only one unit there for defense.
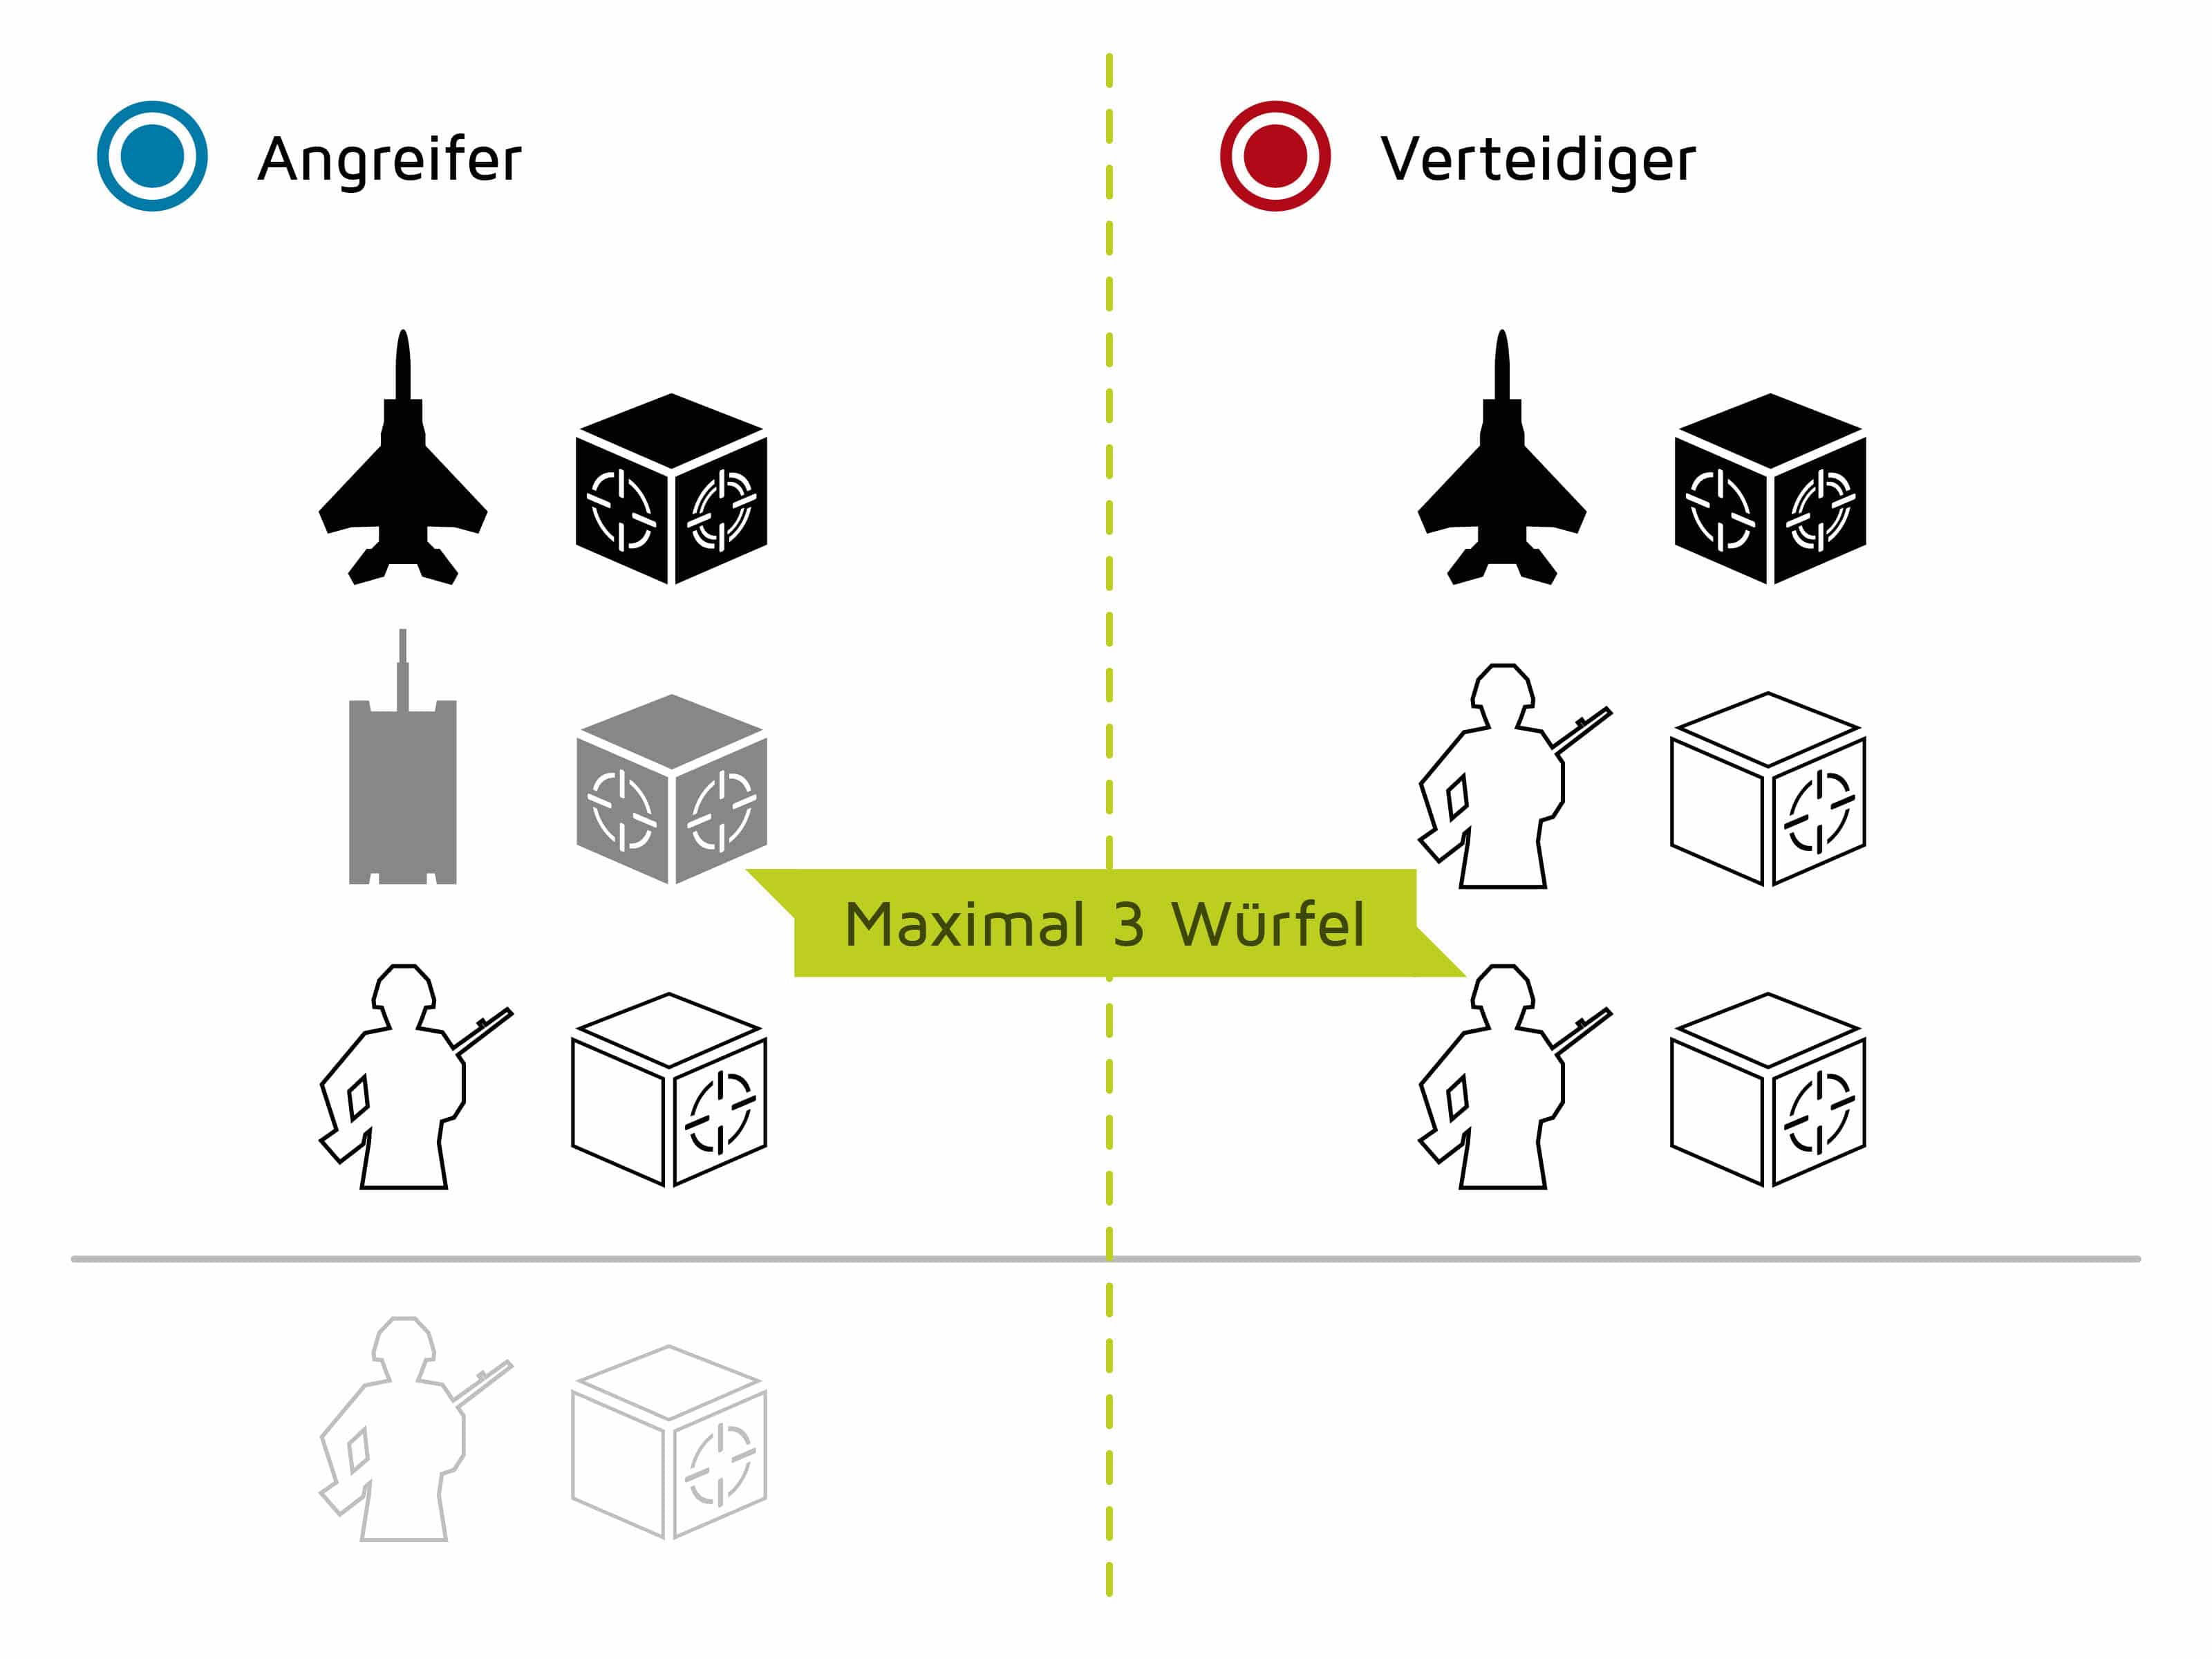
The player may throw a white die for each infantry unit.
How many and which dice (colors) may be used by attackers and defenders depends on the number and type of units available to the respective player in the area.
Example
The defender (red) decides to retreat. Half of the units, in this case 2 units – rounded, are lost and come back into the stock. The remaining half, in this case one unit, comes into the drop zone.
After all defenders have placed their units, the fights begin. In all areas where units of different players are standing, fights are fought, except sea areas: Here the active player decides whether he wants to fight or not. This applies only to units that were already in the sea area before moving, because the move immediately ends for new units in the sea area.
The attacker determines the order of the battles. A fight usually takes place over several campaigns and goes as long as attackers or defenders no longer have units in the area or one of the two retreats.
The battle
- Retreat
- Roll the dice
- Remove losses
- Victory or defeat
At the start of each battle round, the attacker and then the defender (in this sequence) can decide to execute a retreat. In this case, half of their units (rounded up) in the disputed area are lost. These are returned by the player to their reserves next to their player board. The player returns the other half of their units to his/her base camp.
Note: In the case of active “Special Skills” of the nations, the player who plays France, loses no units during a withdrawal, places all remaining units directly in the drop zone on his player board.
The player may throw a gray die for each tank unit.
The player may throw a black die for each flying unit.
Caution: Each side may have a maximum of 3 dice (usually the strongest), even if more units are involved in the battle.
Note: In the case of active “Special Skills” of the nations, the player of the United Kingdom may play a white die in battles in and out of sea fields as well as in all areas connected to a dotted line.
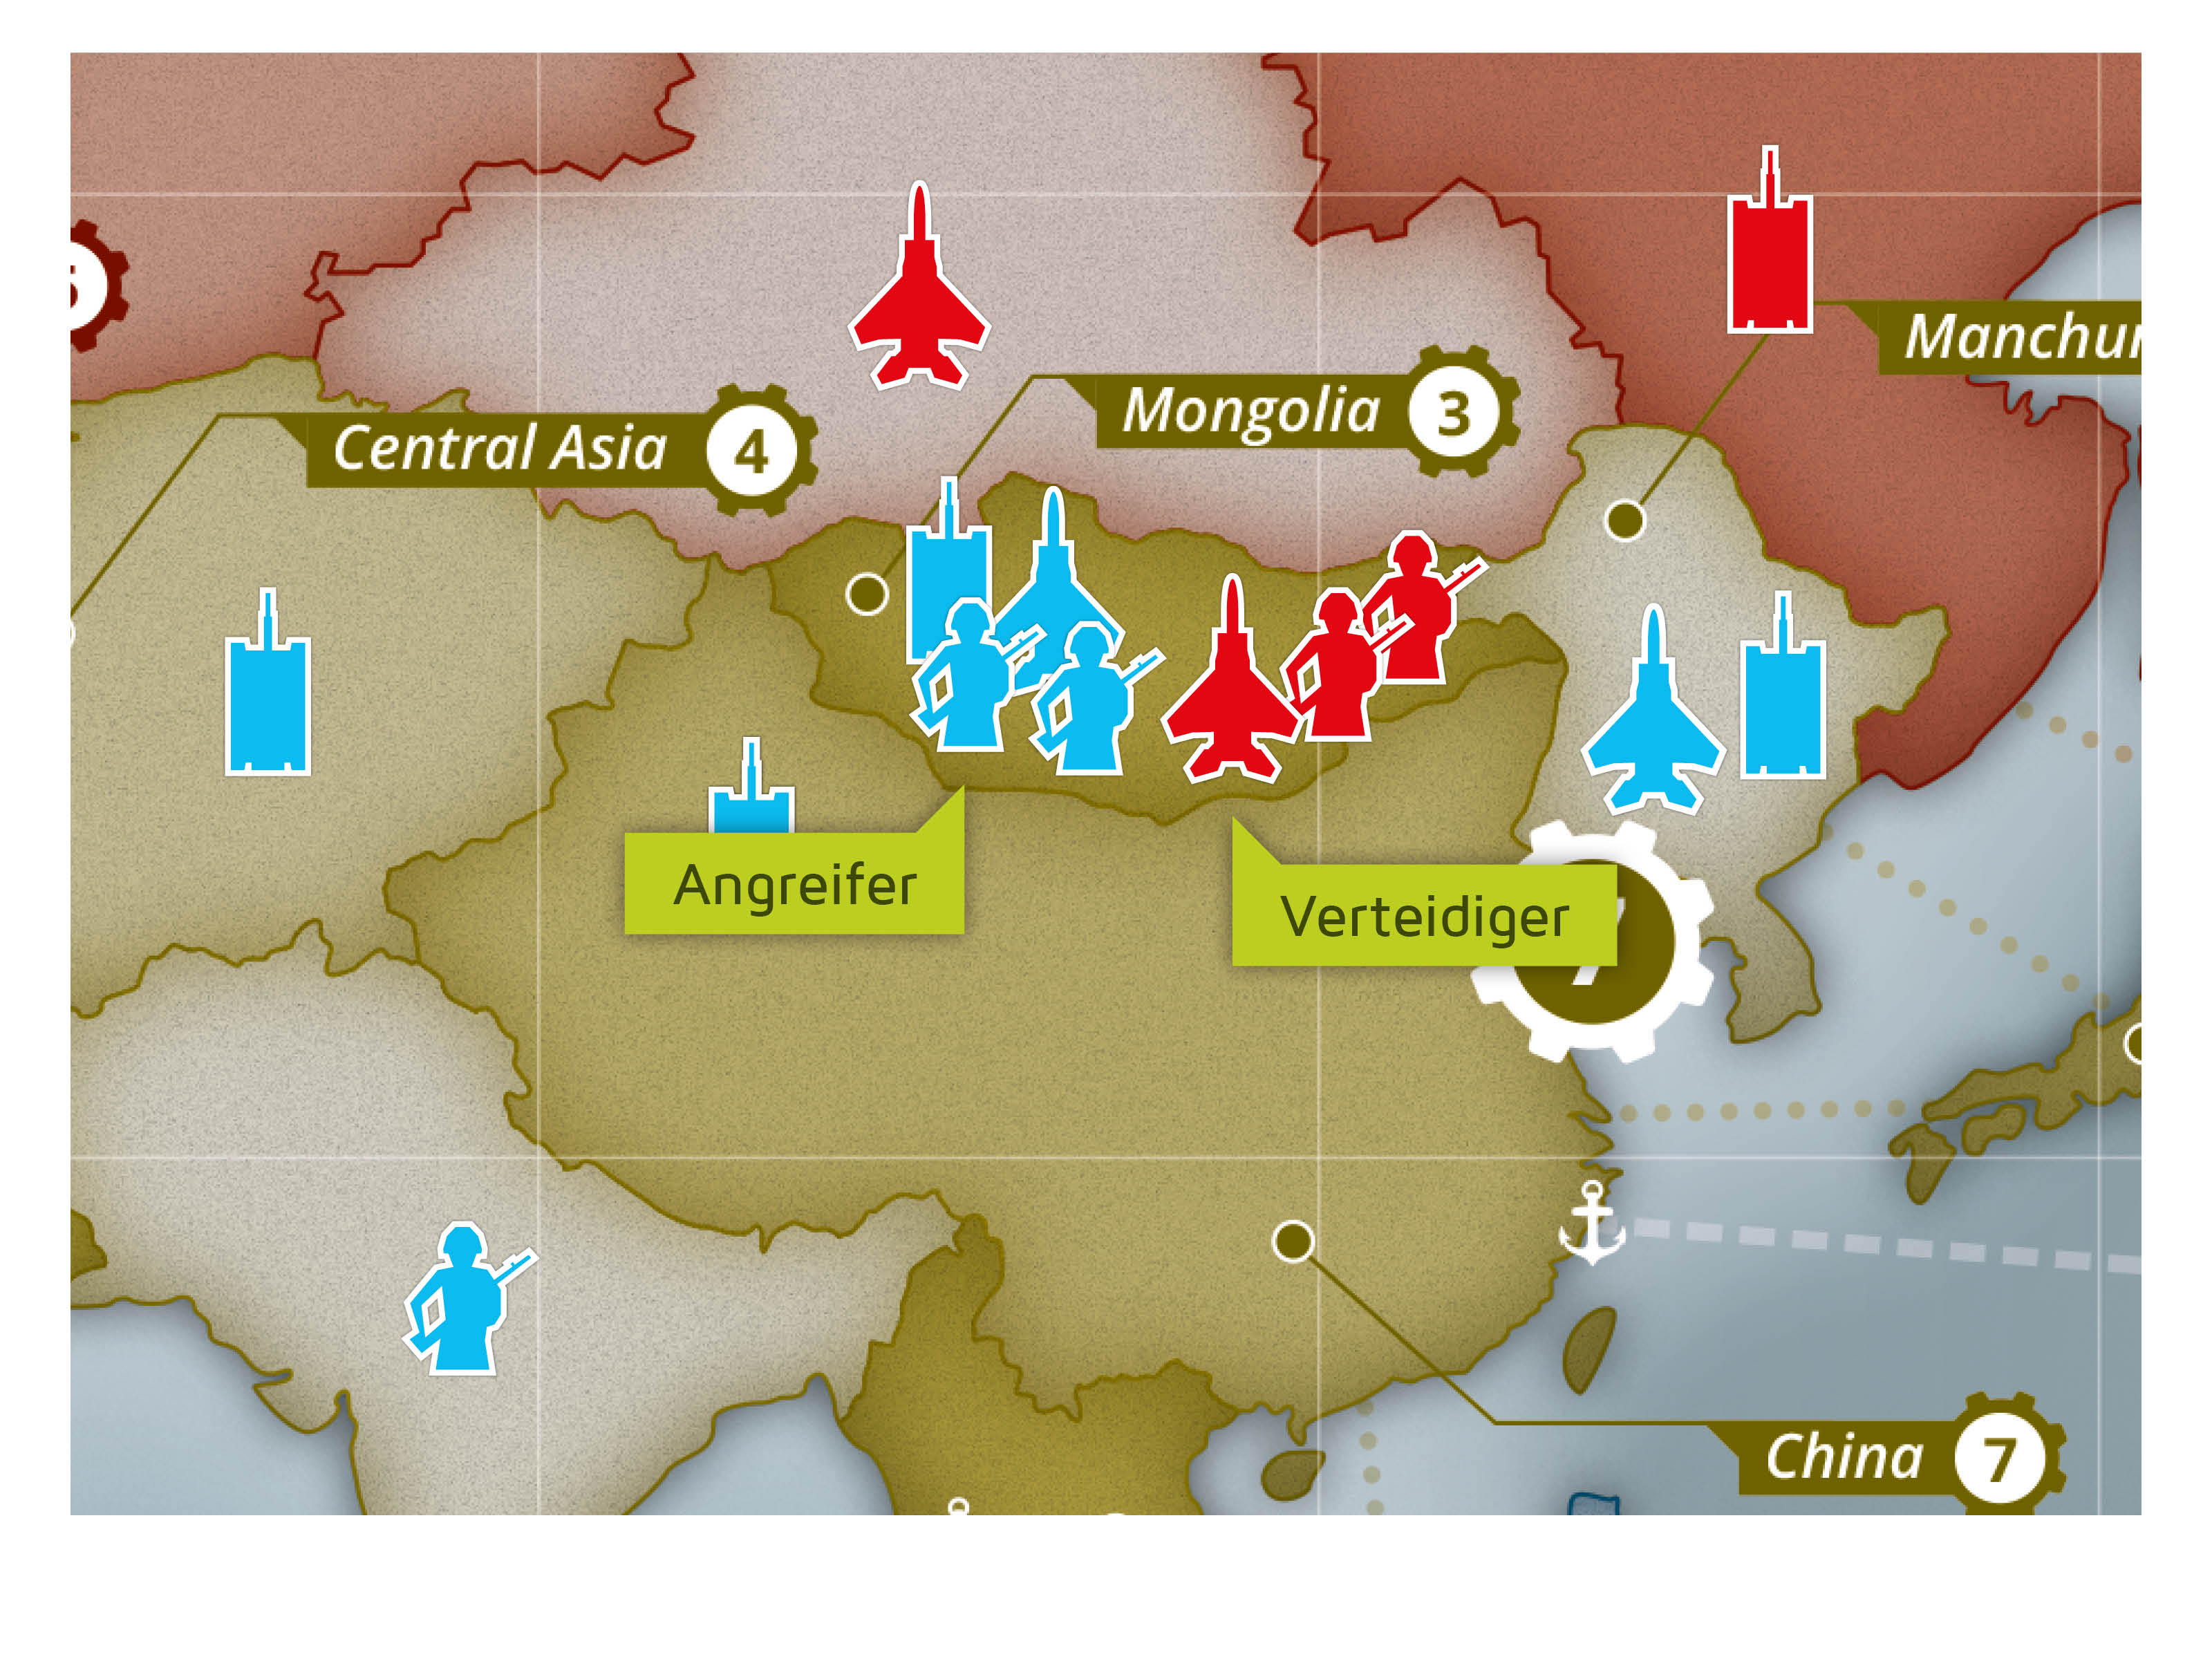
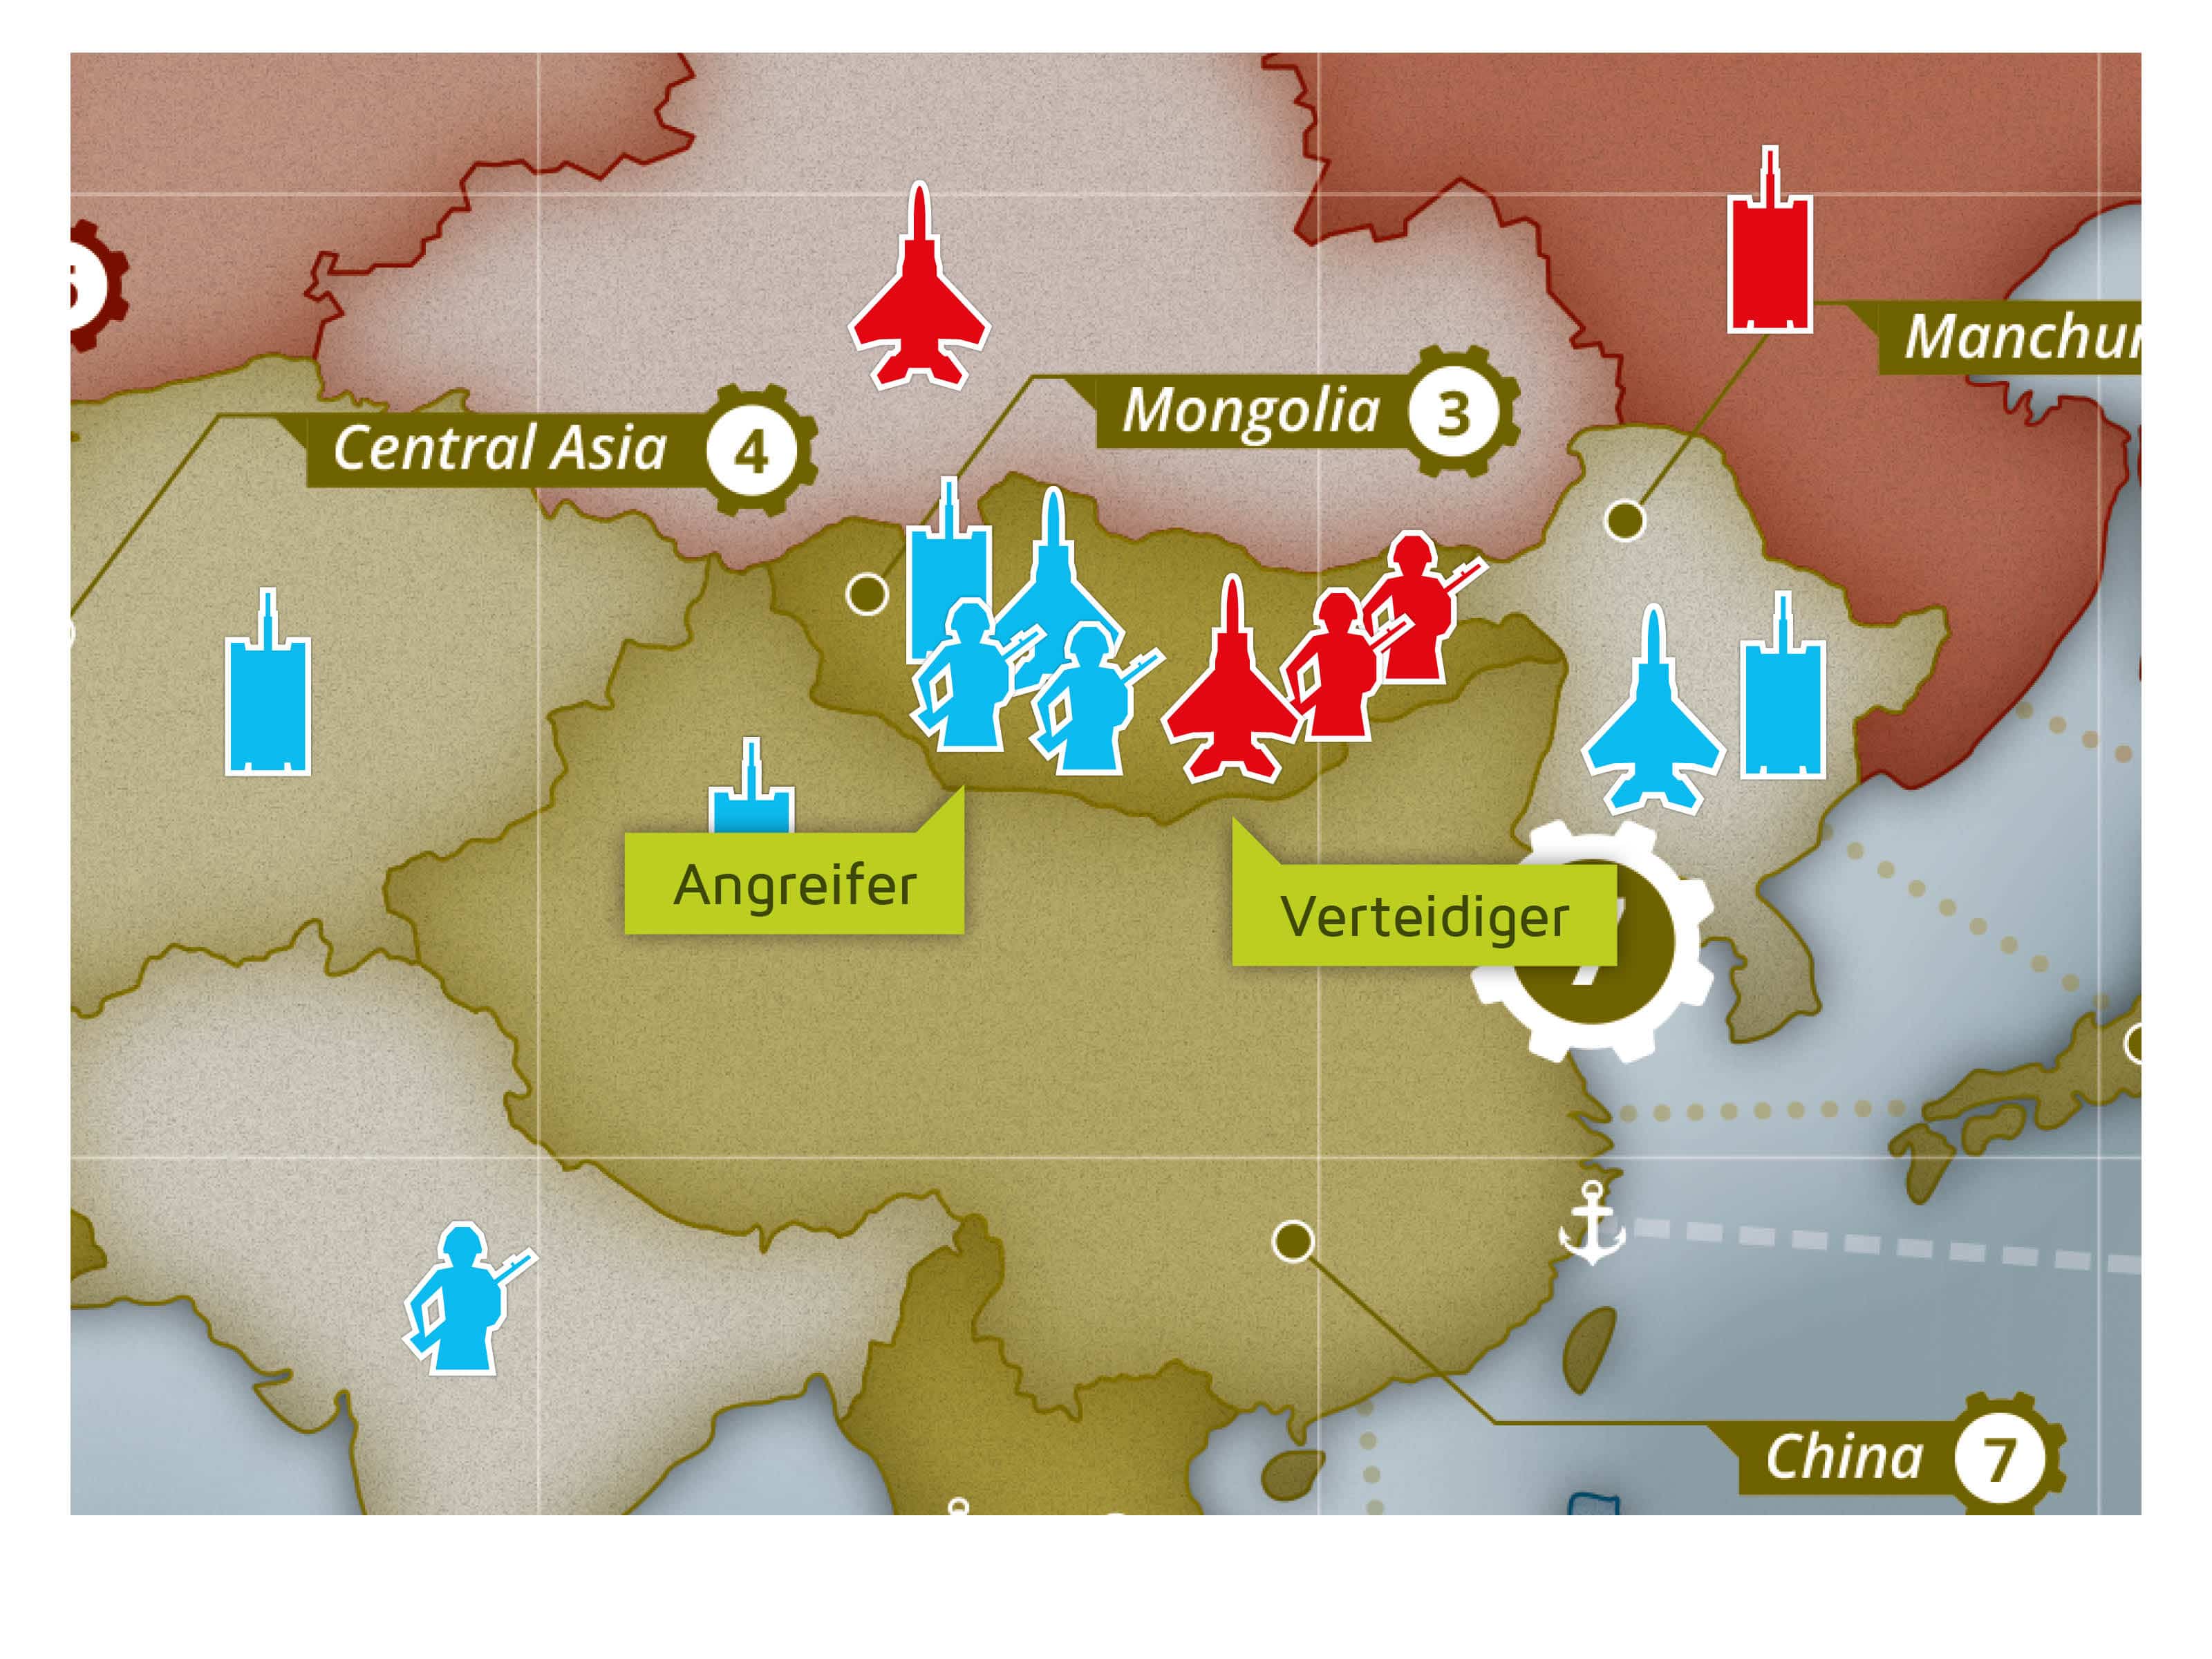
Example “China”
The active player uses four units to attack “Mongolia”:
1 aircraft unit
1 tank unit
2 infantry units
The defender has reached their maximum troop capacity of three units in “Mongolia”:
1 aircraft unit
2 infantry units
The active player (attacker) can thus throw one black die for the aircraft unit, one gray die for the tank unit and one white die for one infantry unit. As he/she may only throw a maximum of three dice, the second infantry unit is for the moment excluded from the battle.
The defender throws one black die for the aircraft unit and two white dice for the two infantry units.
Example “China”
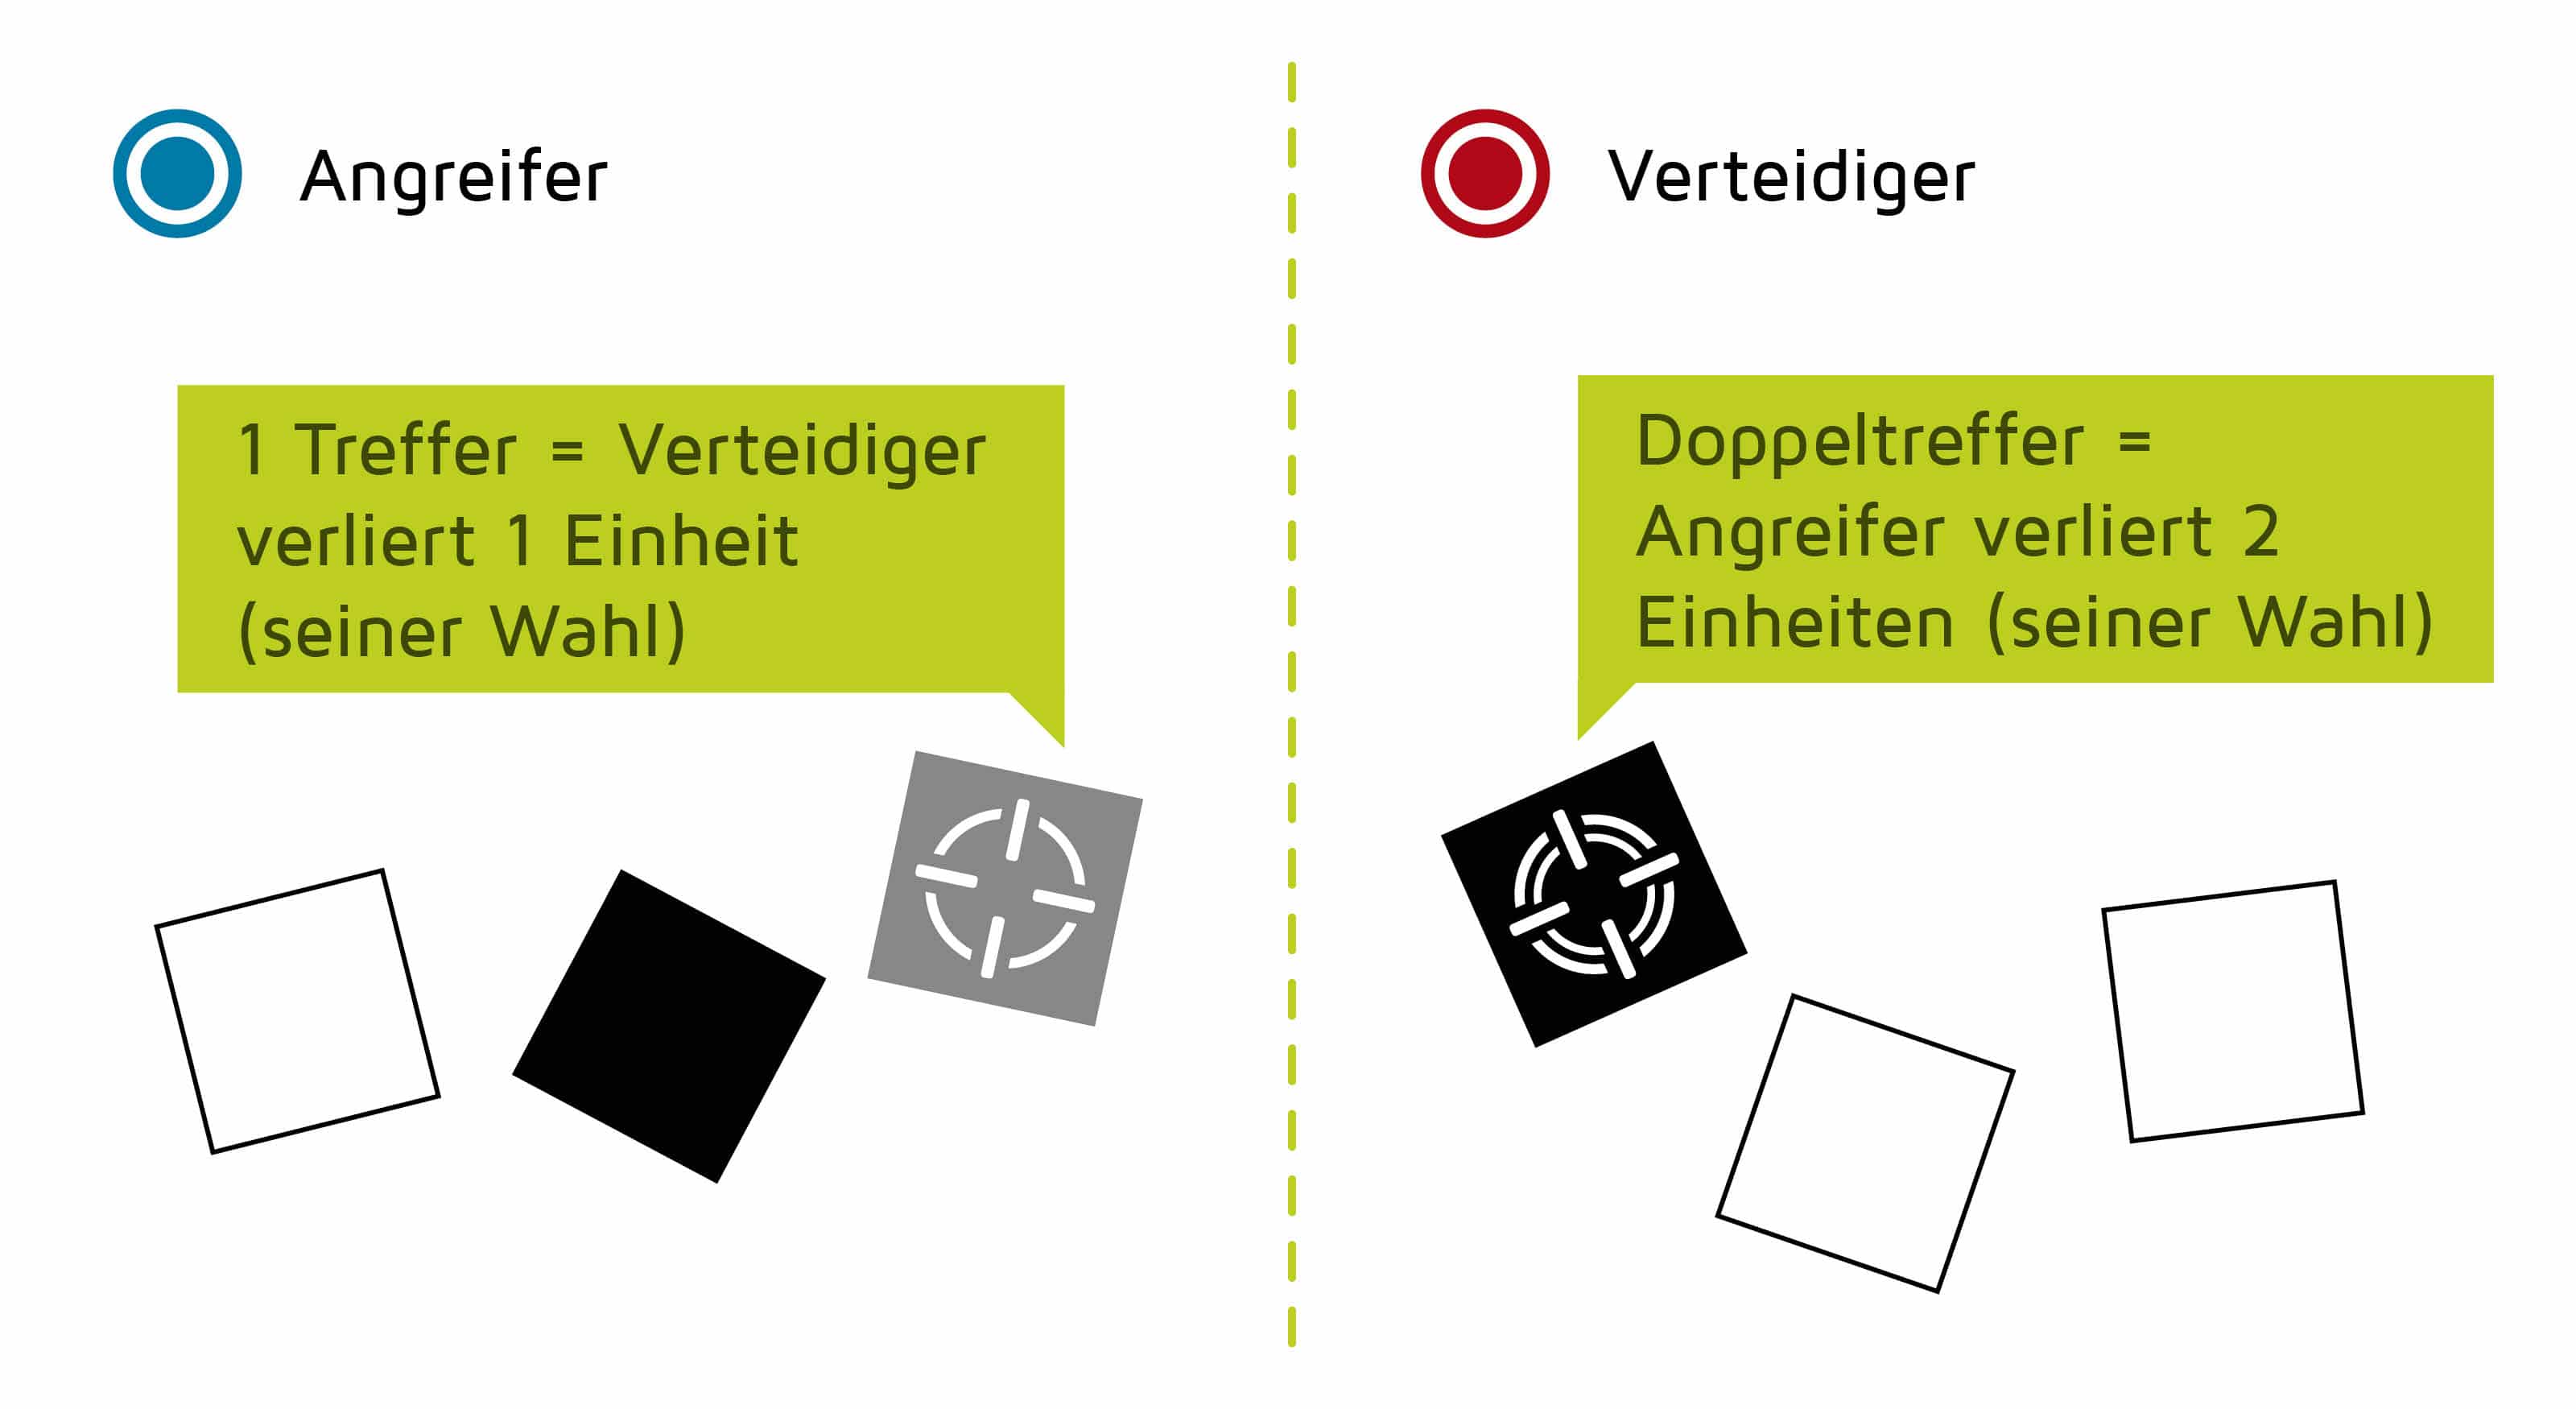
The active player (attacker) throws one hit symbol. This means that the opponent (red) has lost one unit.
The defender throws a double hit symbol. The active player (blue) loses two units.
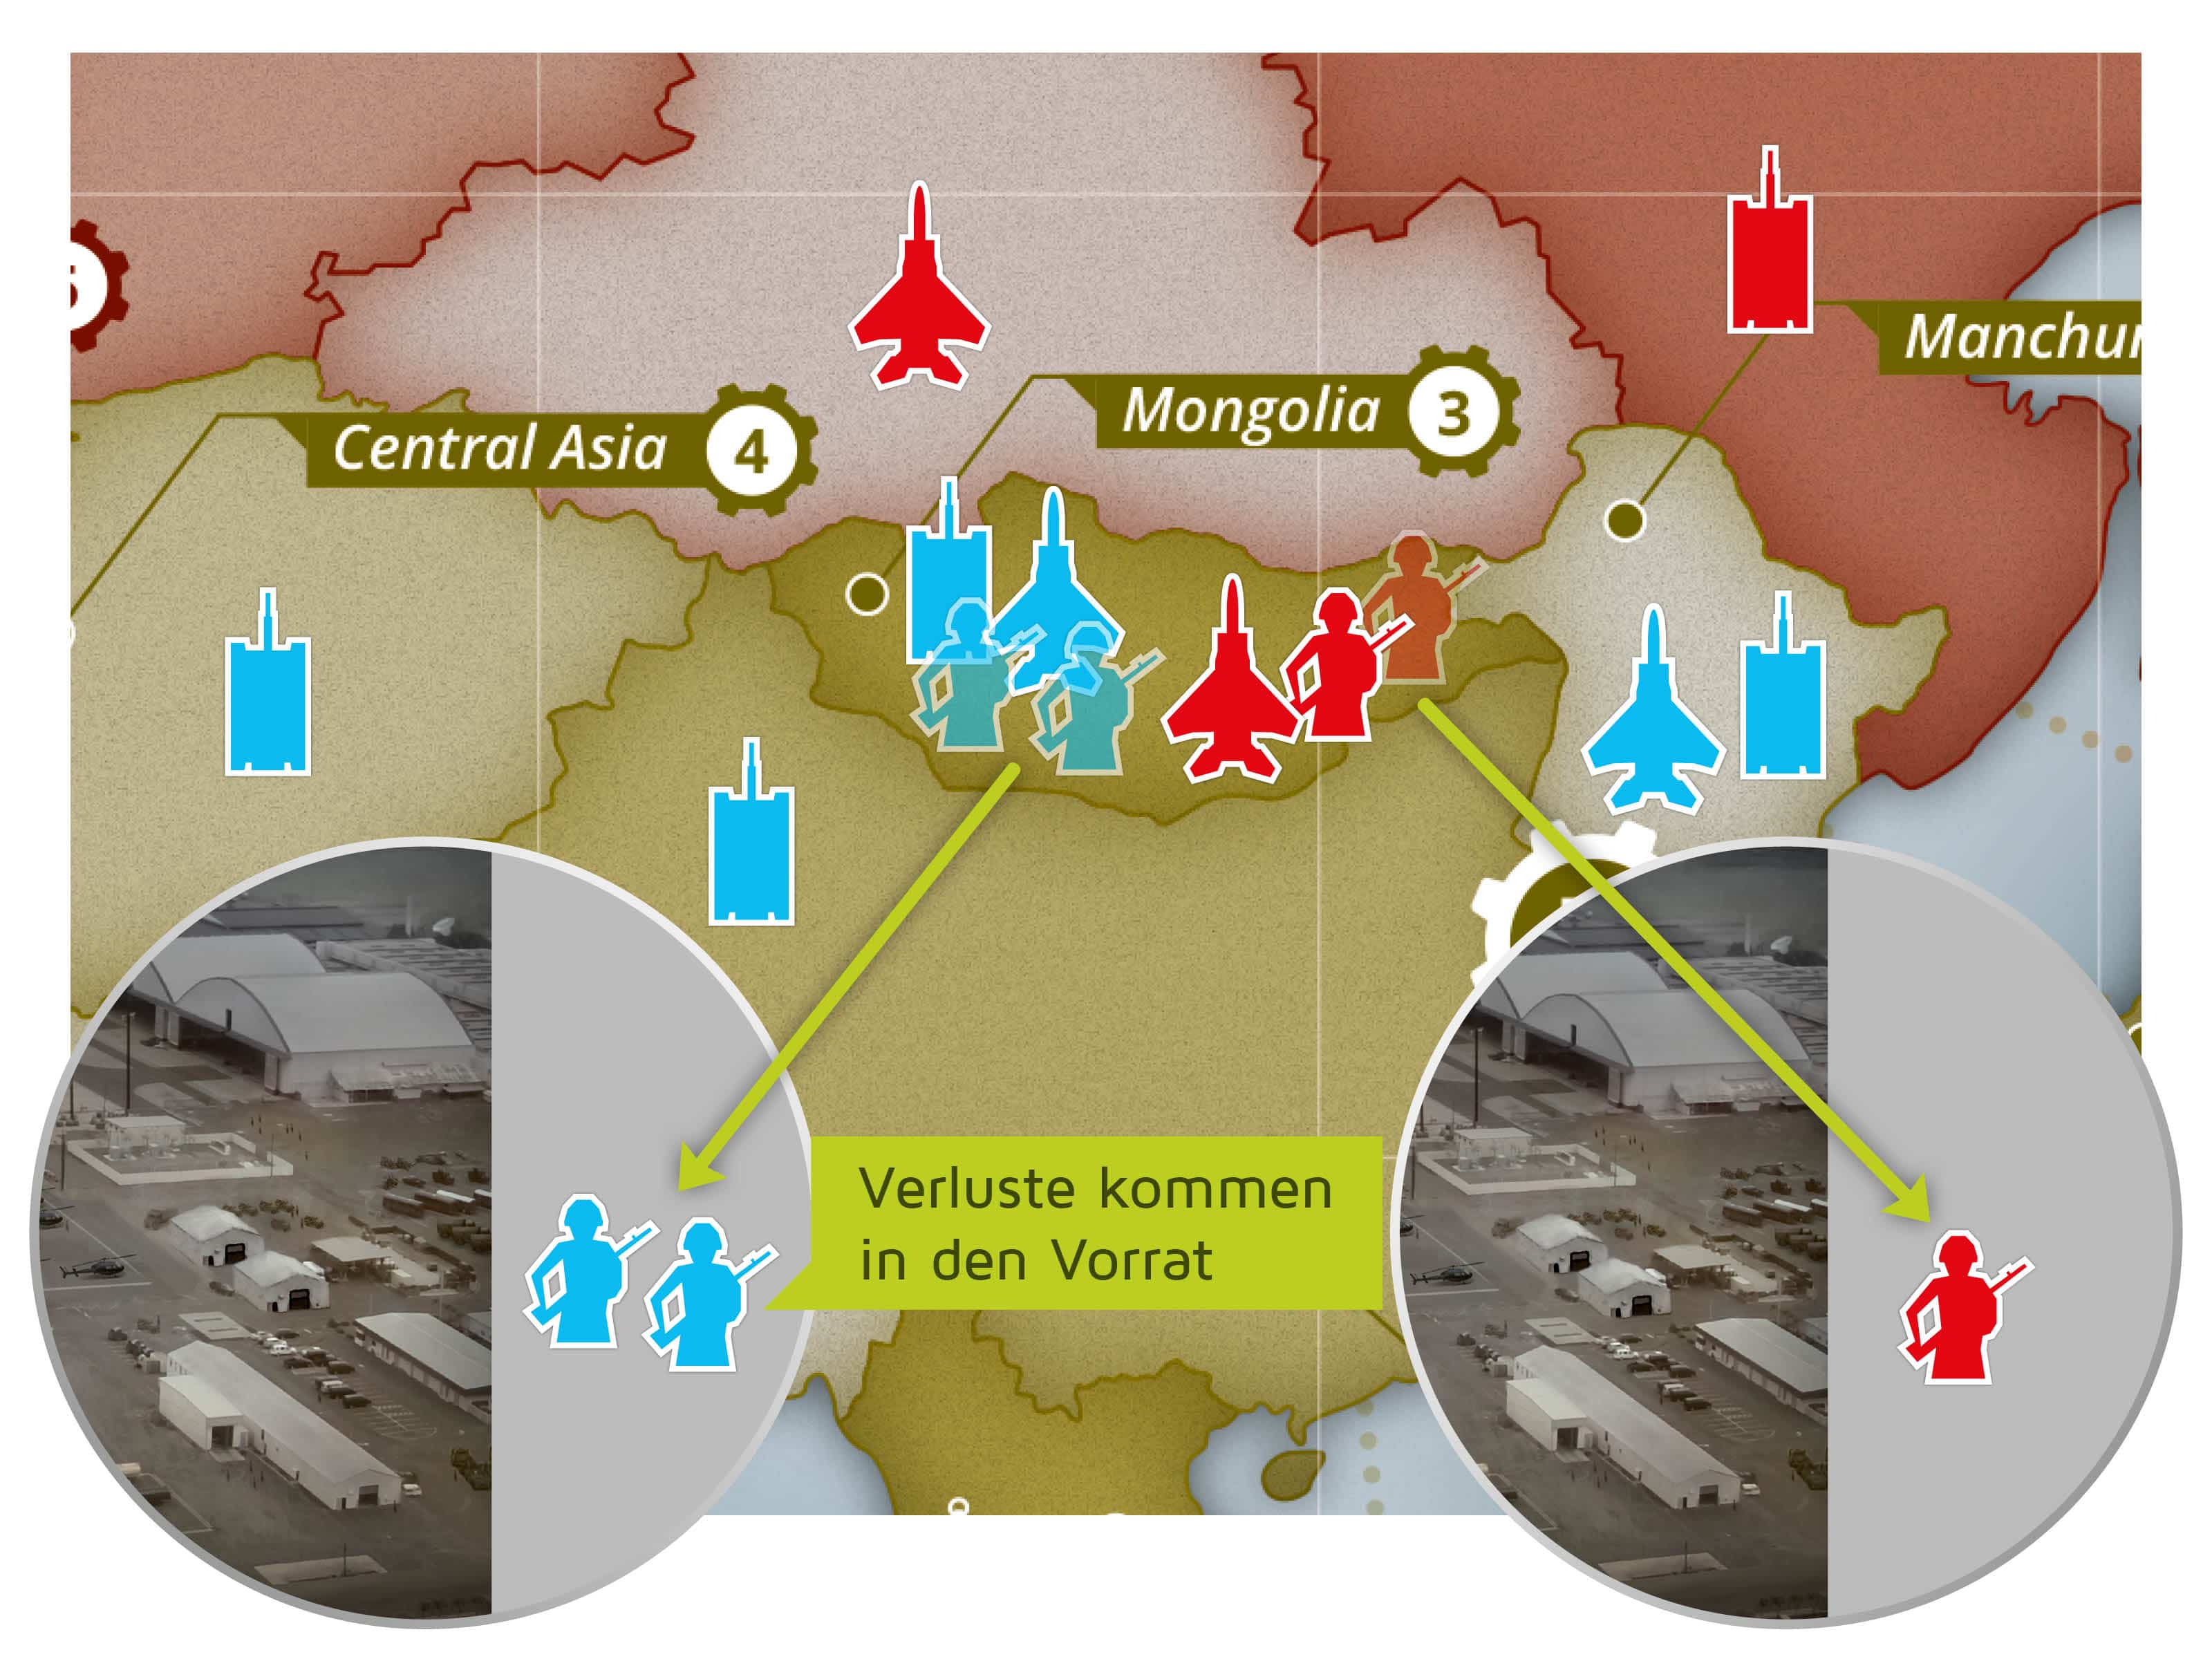
The active player (attacker) removes two units of his/her choice (in this case, the two infantry units) from the area and returns them to their reserves (NOT to base camp).
The defender removes one unit of his/her choice (in this case, one of the infantry units) from their occupied area and also returns them to their reserves (NOT to base camp).
The battle rounds for each disputed area are continued until one of the two players (or alliances) has lost all units in the area or has decided to execute a retreat. There are three possible battle outcomes:
A. The defender has no remaining units in the area.
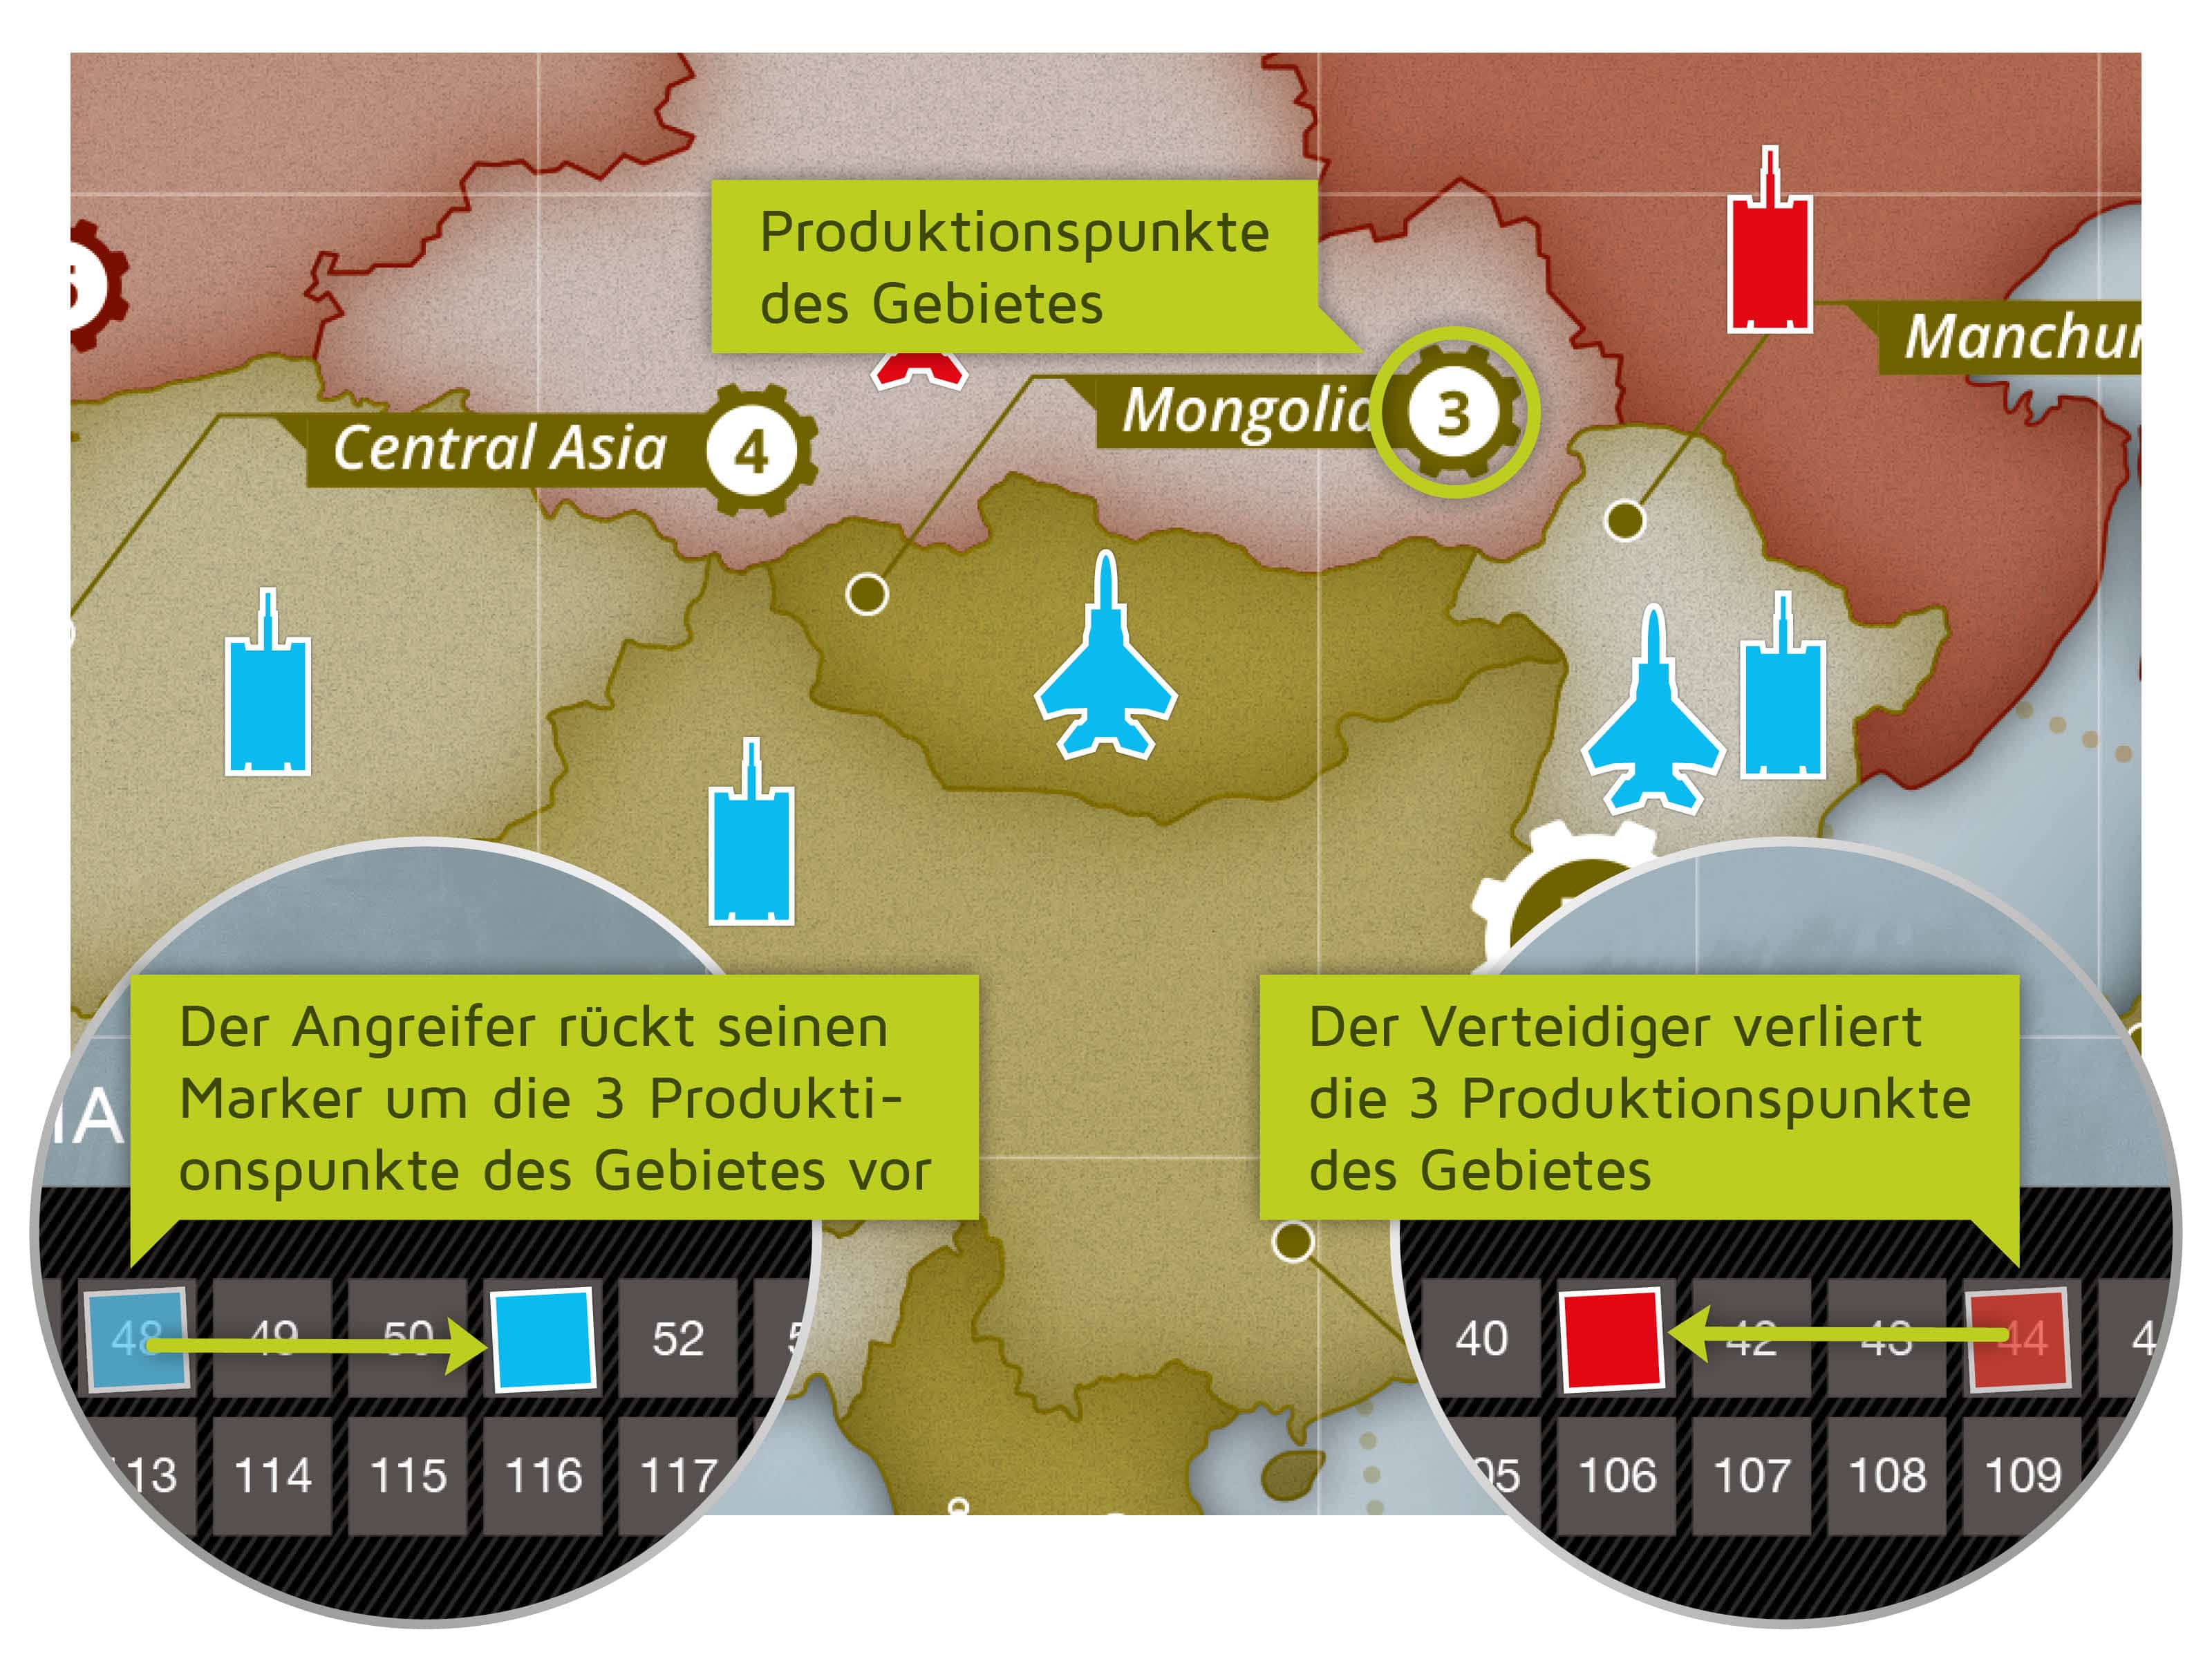
If there are only units of the attacker left in the area at the end of a battle round, the attacker has won the battle. The attacker now moves his/her marker forward on the production points indicator by the number of production points represented by the area while the defender moves his/her marker back by the same number of points.
Note: Production points indicators must also be immediately updated for any continent bonuses won or lost through battle.
B. The attacker has no remaining units in the area.
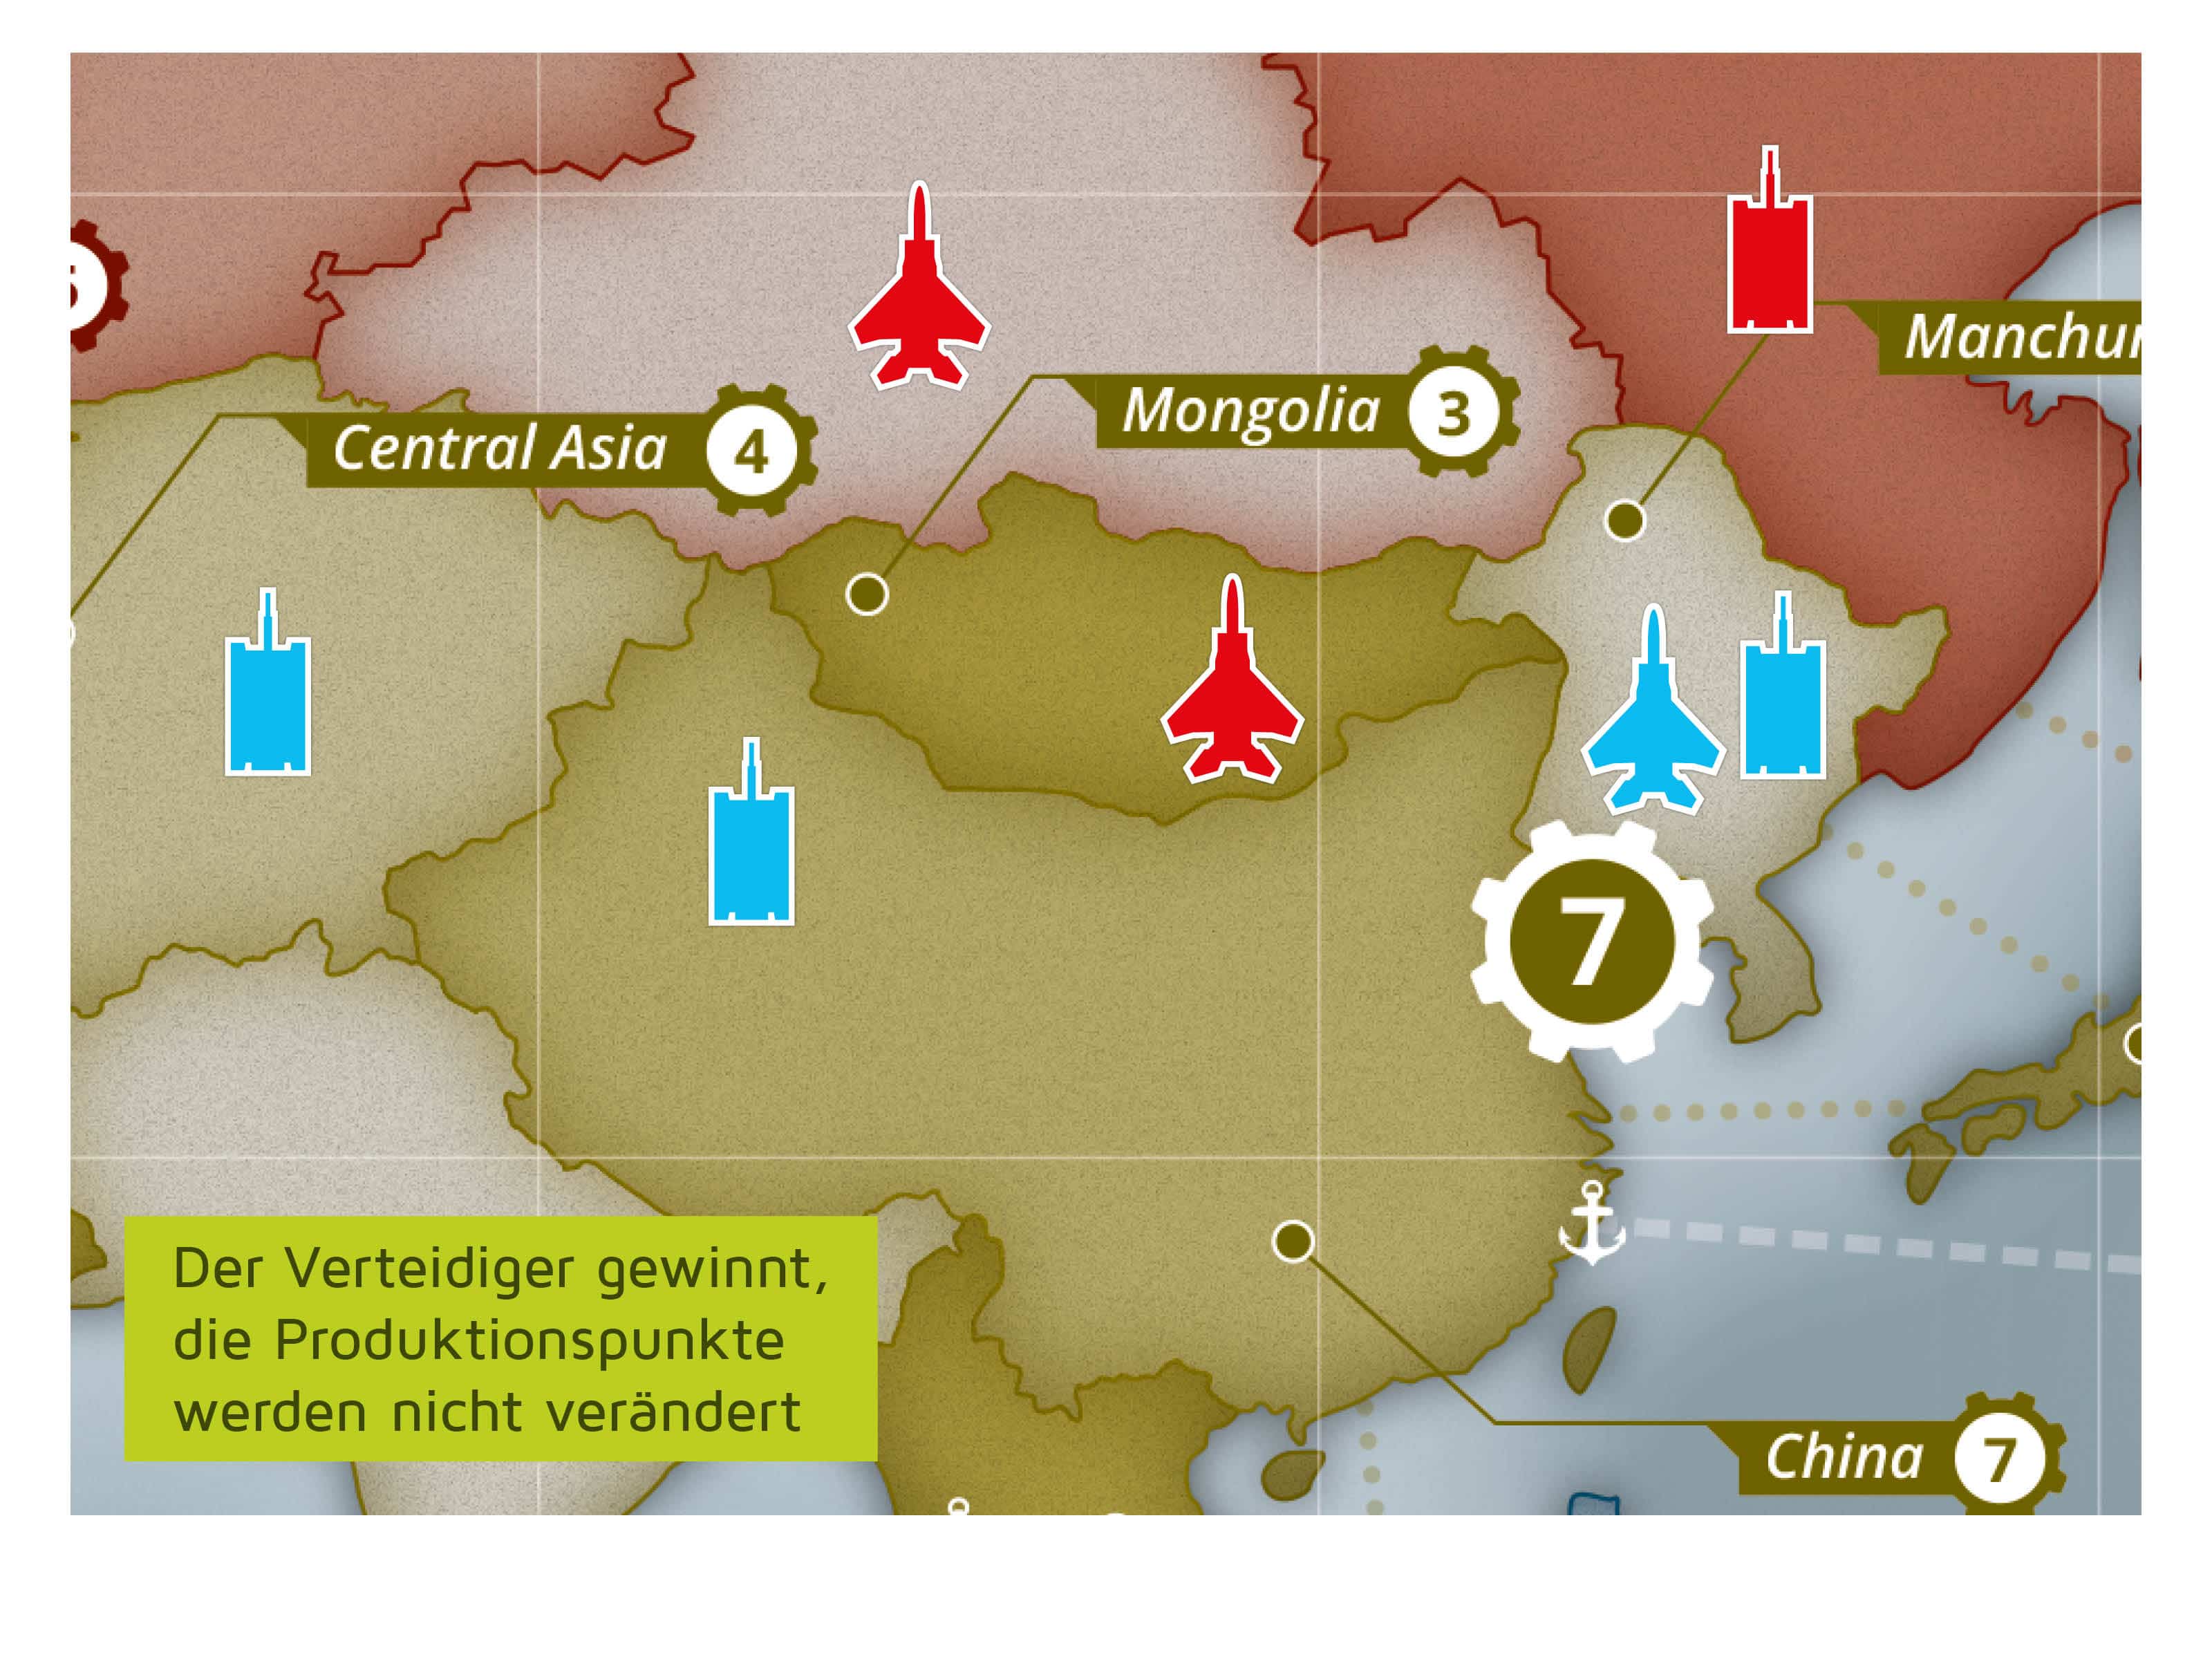
If there are only units of the defender left in the area at the end of a battle round, the defender has won the battle. Neither player moves their markers on their production points indicators.
C. Neither player has any remaining units in the area.
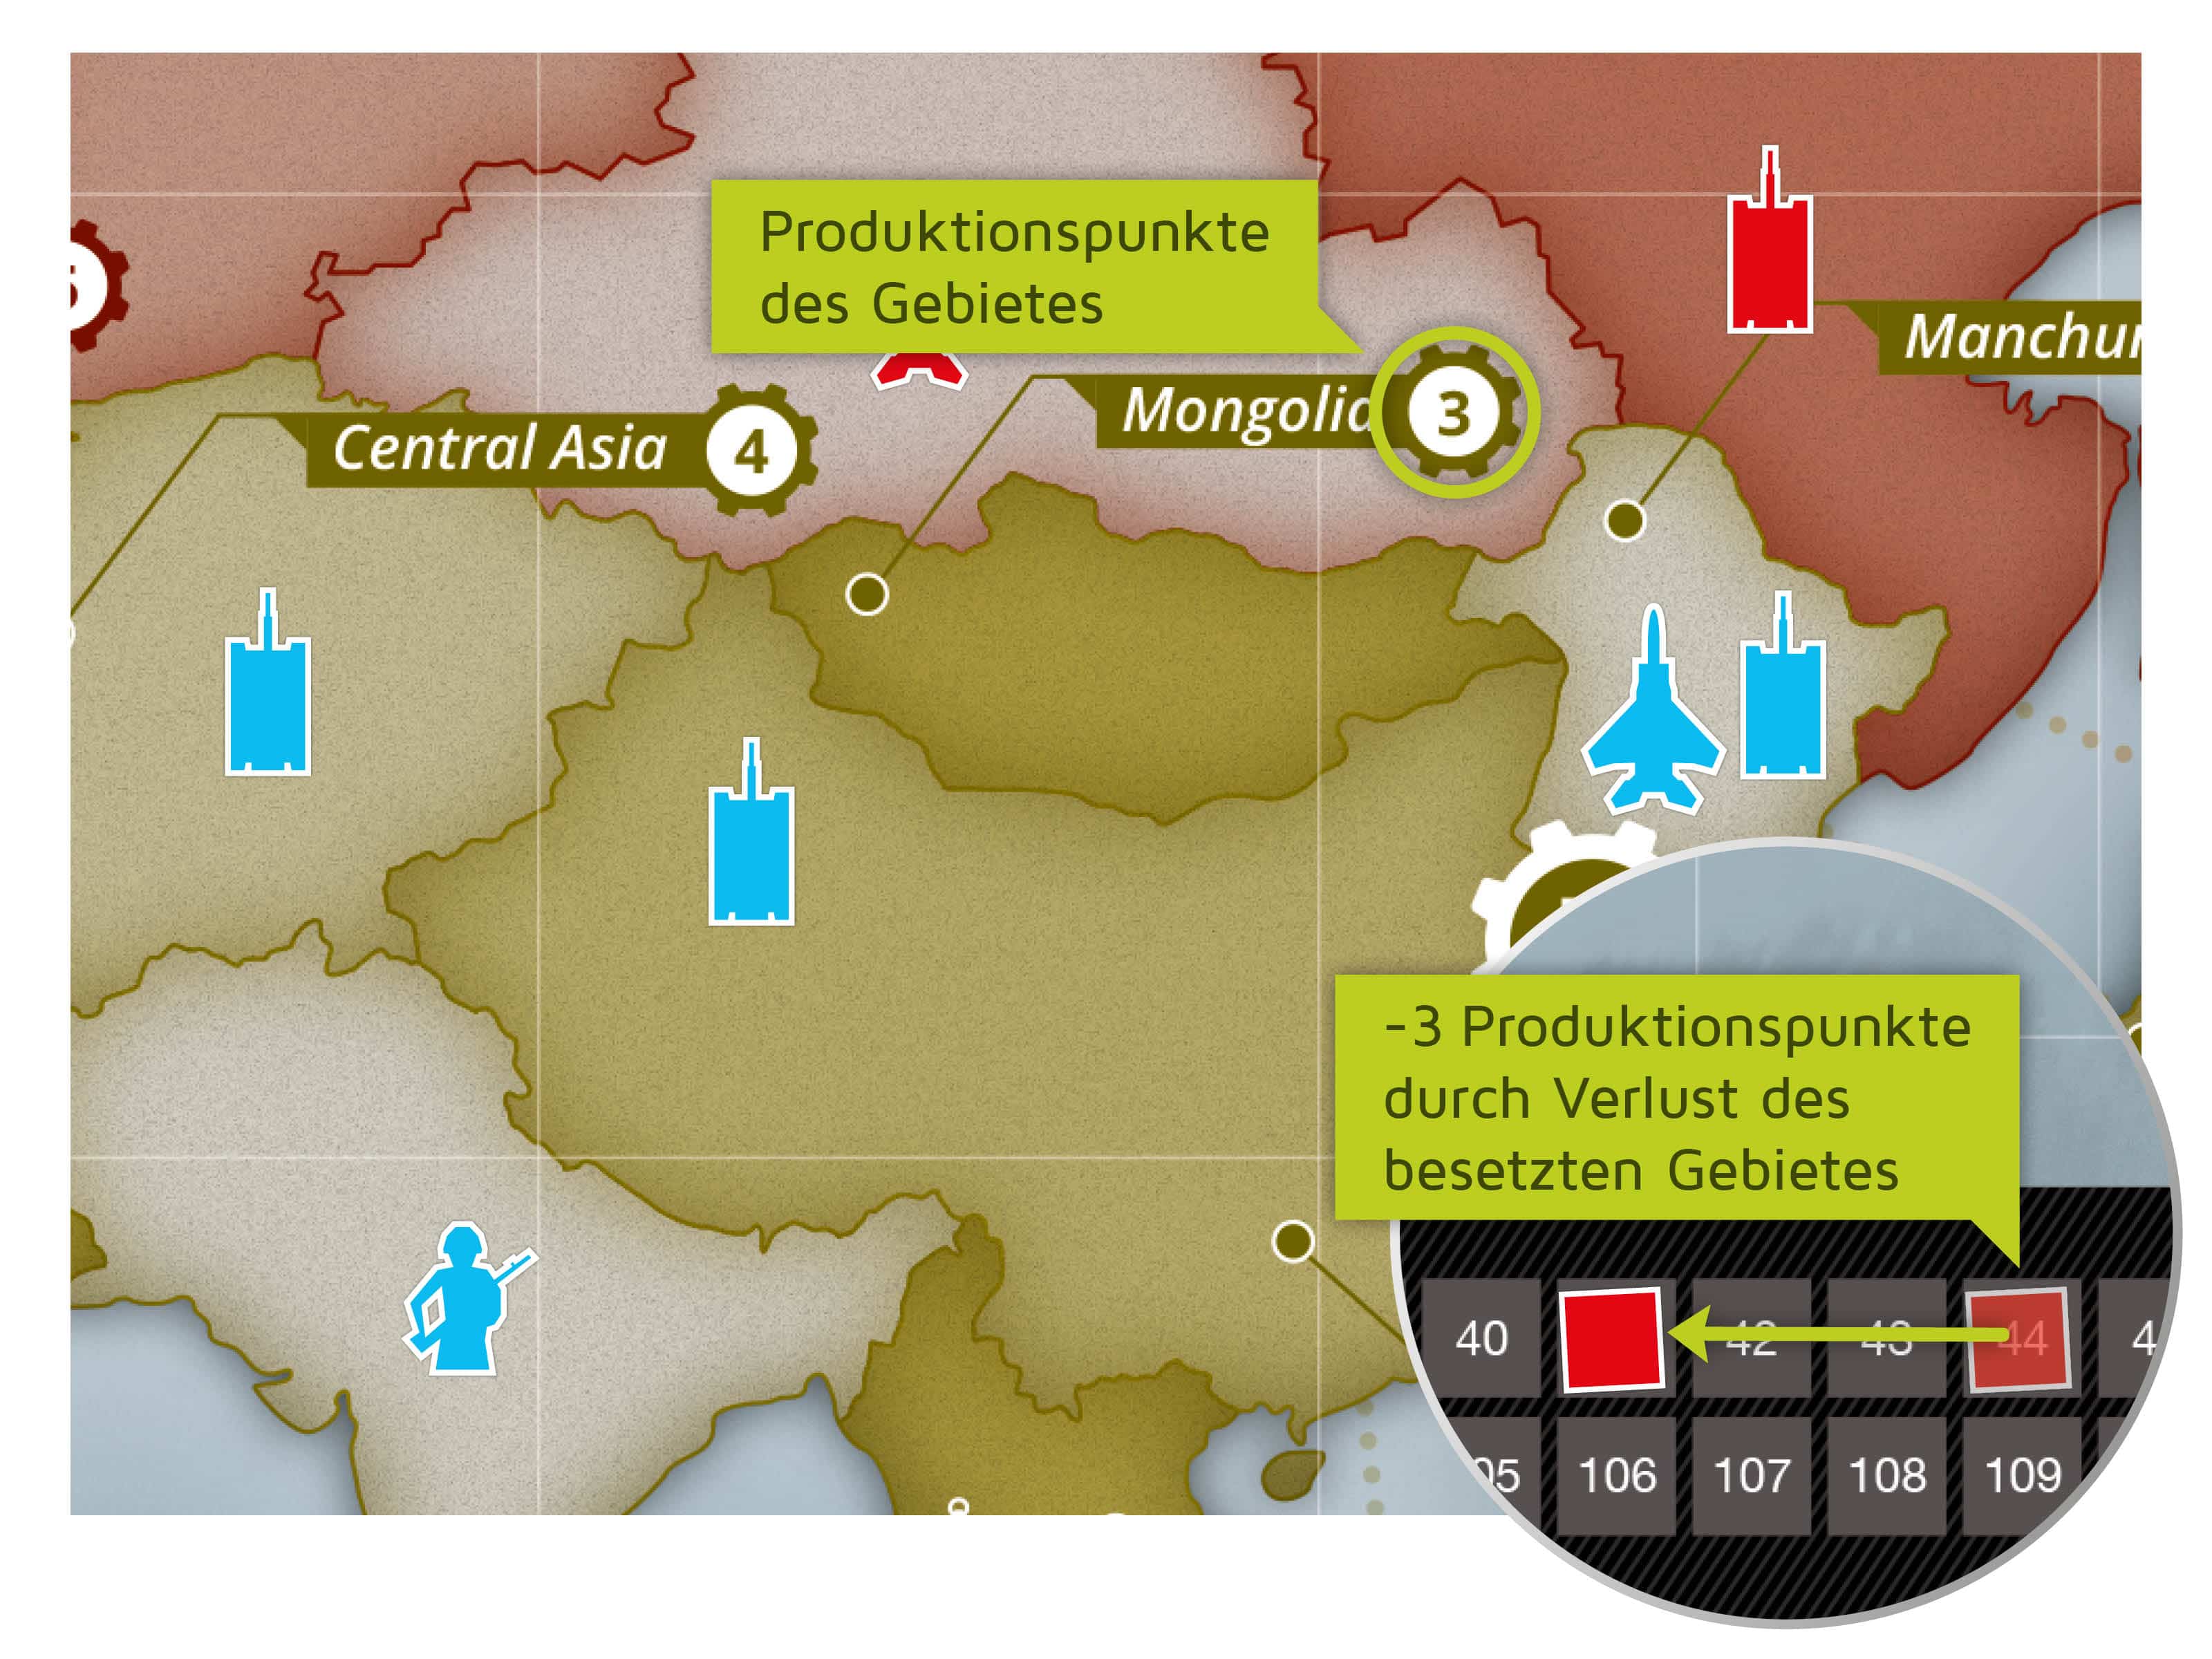
If neither attacker nor defender has units remaining in the area after battle, the result is undecided. However, the defender loses the production points represented by the area because he/she no longer has units in the area. The defender moves his/her marker back on the production points indicator by the corresponding number of points̈. The attacker does not move his/her marker.
Attention: Production points indicators must also be immediately updated for any continent bonuses lost through battle.
Note: The area is now free and can be occupied by one of the next players in the “Move” phase of Phase 3 “Requests and Battles” without combat, provided that they have a directly adjacent area.
Example “Defender has no remaining units in the area”
The active player (blue) wins the battle for “Mongolia”. He/she moves their marker forward on the production points indicator by the number of production points represented by “Mongolia”.
The defender (red) loses the battle for “Mongolia” and moves his/her marker back by the same number of points.
Example “Attacker has no remaining units in the area”
The defender (red) has won the battle for “Mongolia”. This means that there is no change to the total production points of the defender and the active player (blue). They lose only the units lost in battle.
Example “Neither player has any remaining units in the area”
The active player (blue) and the defender (red) lose all their units in the battle for “Mongolia”. However, as the defender (red) no longer occupies the area, he/she must move their marker back on the production points indicator by the corresponding number of points.
The area “Mongolia” is now free. It can now be reoccupied without battle in phase “Move“.


